
WordPress is one of the most popular content management systems (CMS) in the world. With more than 44% of the internet built on it, WordPress allows users of any expertise level to quickly create a website. It doesn't require extensive coding knowledge; instead, it works similar to traditional word processors. In this guide for WordPress beginners, we will explore the advantages of using WordPress, provide a step-by-step tutorial on its dashboard, and walk you through the process of creating pages and making your site live.
Let's get started.
What is WordPress?
WordPress originated in the 90s as a blogging platform. Since then, it has evolved into a powerful CMS capable of building any type of website, from a membership site to an online store. WordPress comes in two versions: .com and .org. Though the core platform is the same, there are significant differences between the two. The main distinction lies in how they are hosted. With .org, it is considered a self-hosted platform, which means you need to purchase a separate hosting plan to use it. On the other hand, the .com version of WordPress is an all-in-one platform with built-in hosting.
In this guide, we will primarily focus on .org because of its additional benefits.
The Advantages of Building a Website with WordPress
There are many reasons to choose WordPress. First and foremost, it's free to use. However, there are hidden costs such as hosting, domain, plugins, and themes that can add up quickly. Nevertheless, the ease of learning WordPress outweighs the cost. It is relatively simple once you overcome the initial learning curve, and there are numerous tutorials and documentation available from various sources if you encounter any difficulties.
Another advantage of WordPress is its flexibility for customization. Whether you're creating a blog, an ecommerce site, or a large online community, there is a vast selection of themes and plugins that allow you to design a unique browsing experience for your visitors. WordPress is beginner-friendly, so you can easily modify the layout, colors, fonts, and other design elements. If you're an advanced developer, you can utilize custom code snippets and webhooks to customize WordPress to your specific requirements.
As your website grows, WordPress can handle increased traffic and content effortlessly. Additionally, it is SEO-friendly, which means it is optimized for search engines, allowing your website to rank higher in search results pages (SERPs) and attract more organic traffic.
Setting Up Your Hosting Plan
Before we delve into the details of the WordPress dashboard, it's crucial to understand the importance of choosing a reliable hosting provider. Selecting the right hosting partner is vital for your website's success. Your web host should be fast, reliable, scalable, and secure, while still fitting within your budget. Fortunately, many excellent WordPress hosts are available, and we recommend a perfect choice for anyone: SiteGround.
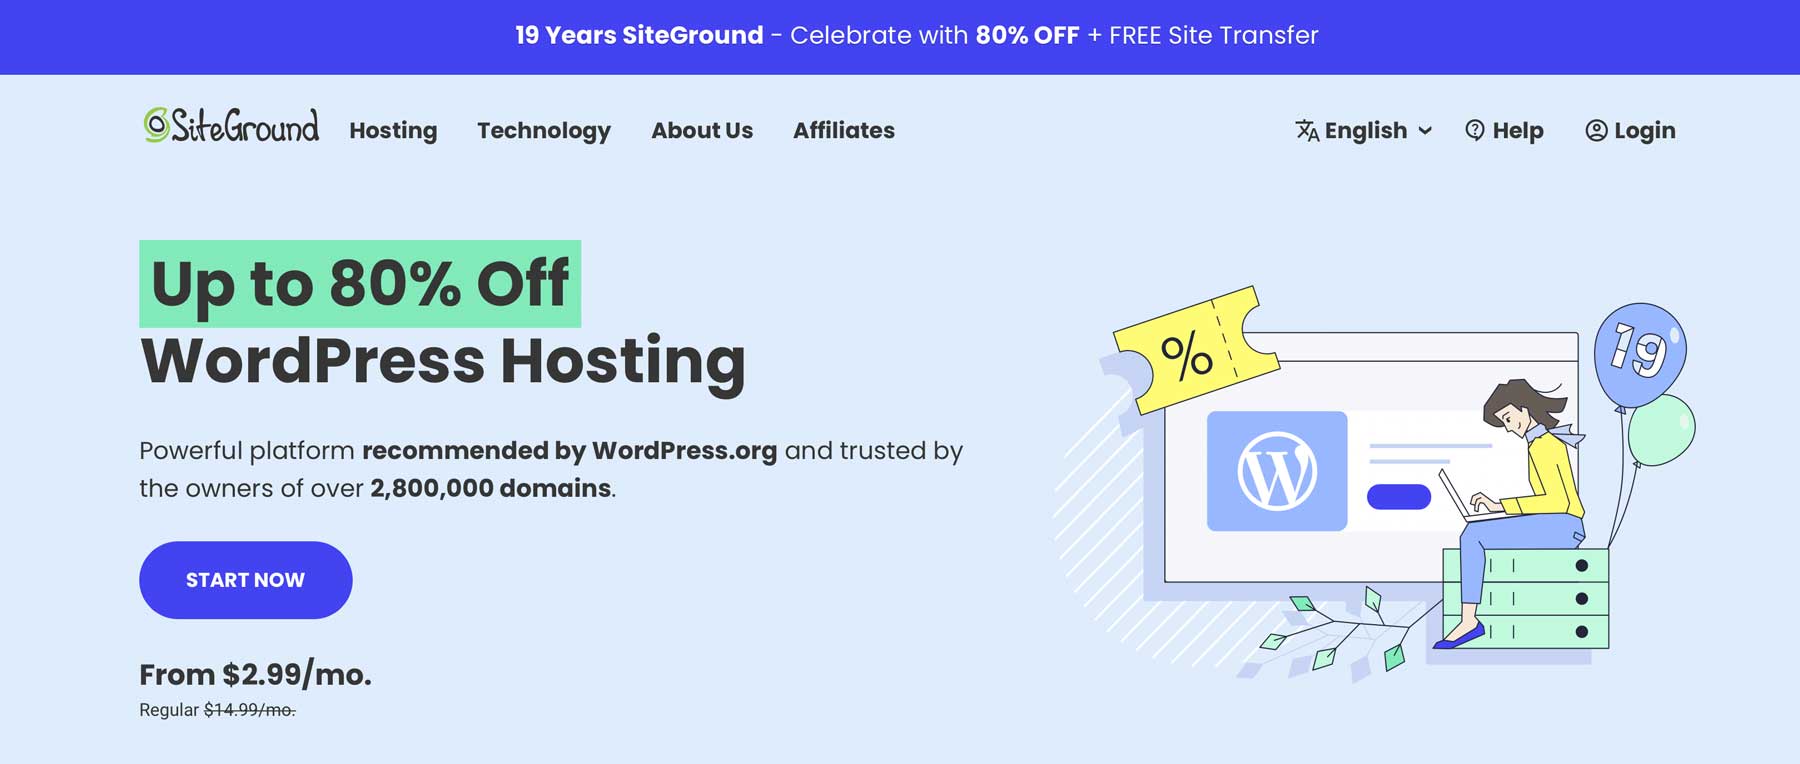
SiteGround offers three plans suitable for both beginners and experts. It accommodates all budgets, with monthly prices ranging from $15 - $40. SiteGround frequently offers special deals, so there's a high chance of getting a great offer. Aside from being cost-effective, SiteGround also provides exceptional value. They offer features such as free emails, SSL, CDN, and migration, ensuring that your website runs smoothly.
Security is also a priority for SiteGround. Their web application firewall (WAF) keeps malicious hackers at bay. Additionally, you can count on them to protect your website from malware, DDoS attacks, and other security concerns.
Setting Up WordPress
In the following steps, we will guide you through the process of installing WordPress, navigating the dashboard, and creating content to make your site live. Once you complete these steps, you'll understand why WordPress is ideal for beginners.
Step 1: Installing WordPress
There are several ways to install WordPress, including using a hosting provider, manual installation, or using local environments like Local by Flywheel or MAMP Pro. In this tutorial, we will demonstrate how to install WordPress using SiteGround's Site Tools dashboard. If you want to learn other installation methods, refer to our comprehensive guide.
Install WordPress via SiteGround
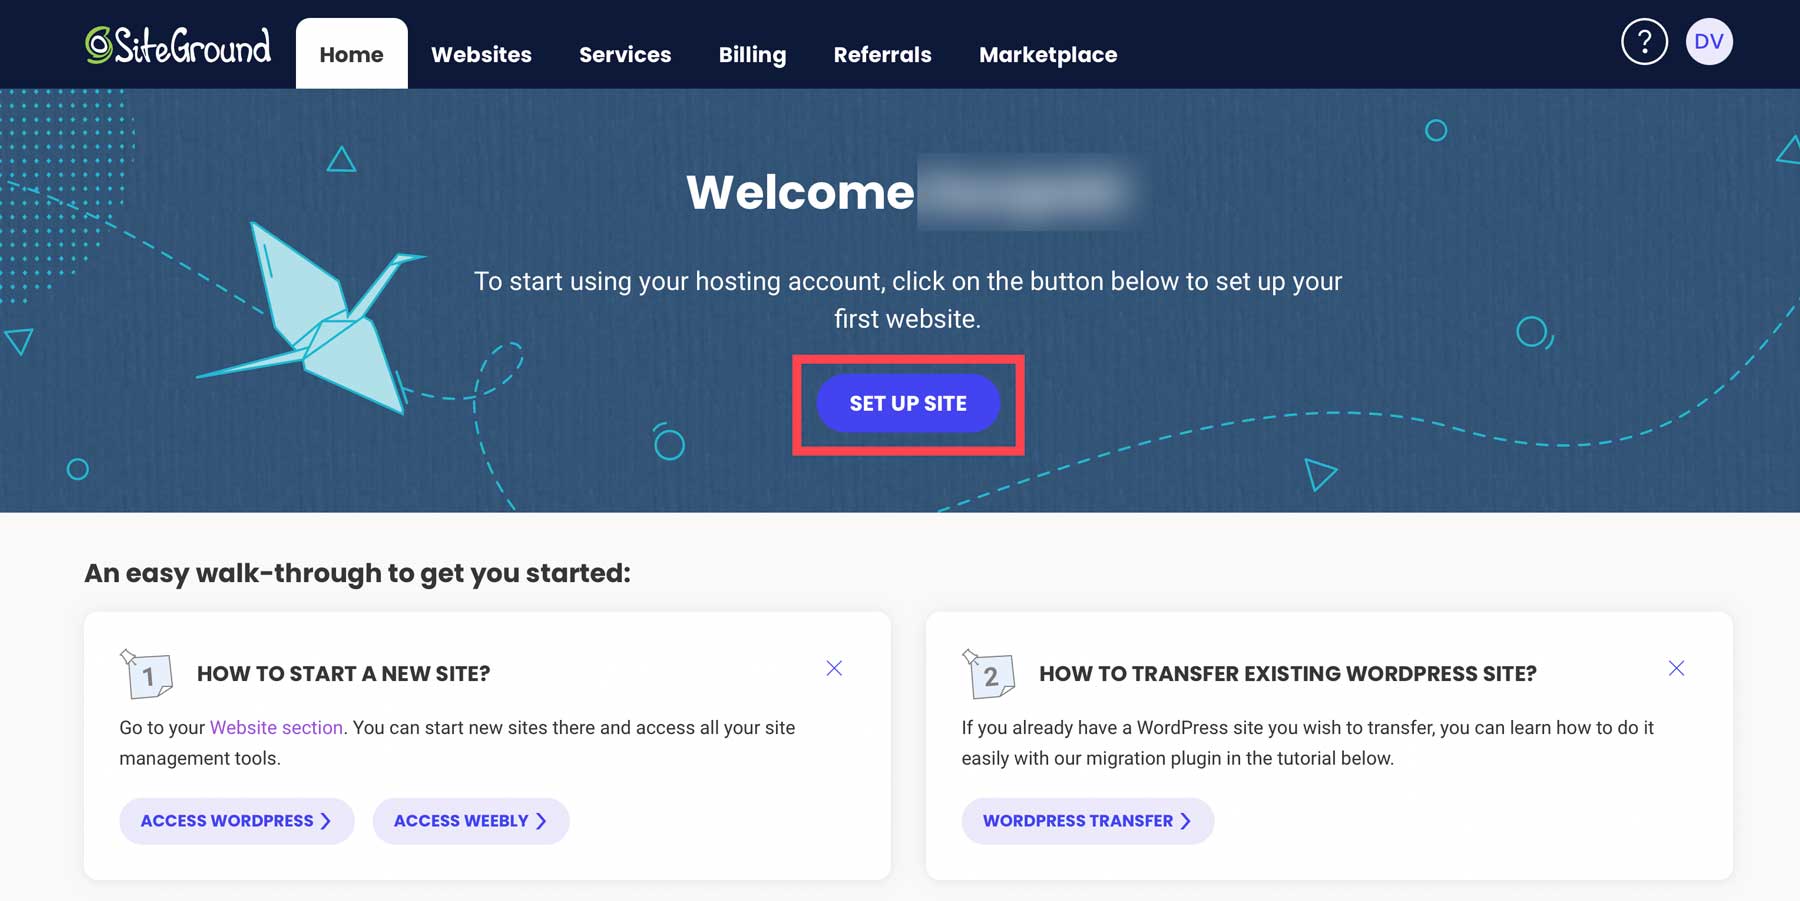
After signing up for a SiteGround account, you can easily install WordPress with just a few clicks. Start by clicking the "Set up site" button at the top center of your screen.
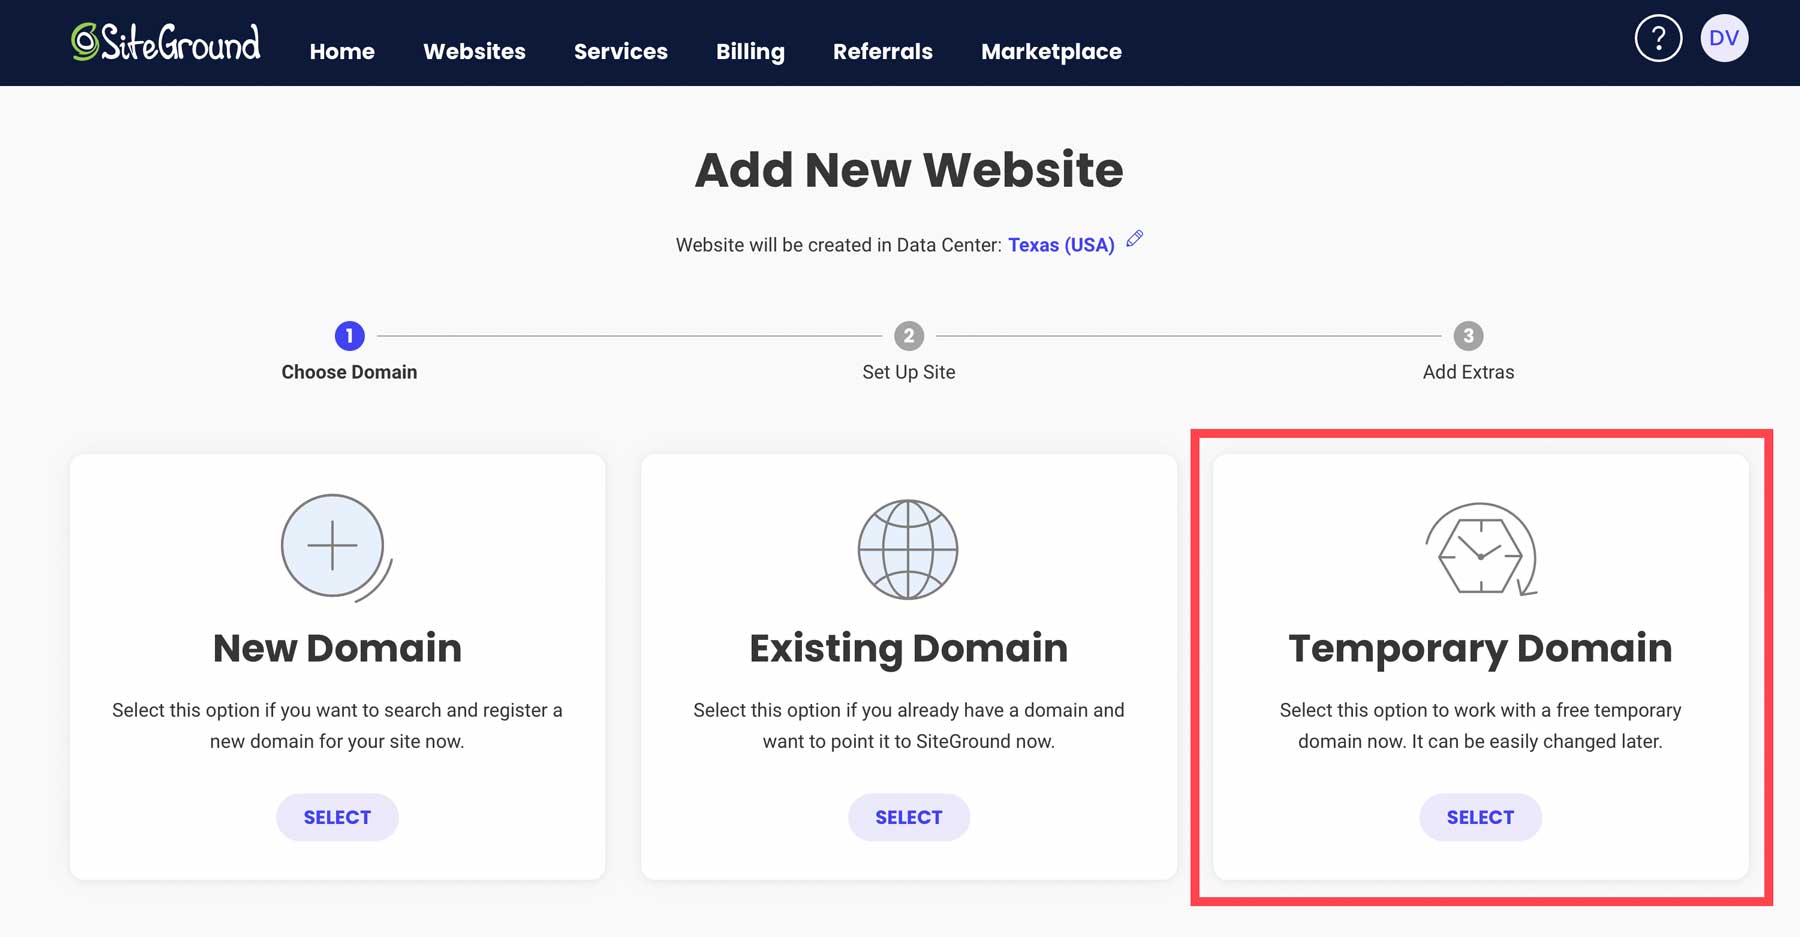
Next, choose whether to set up your site on a new, existing, or temporary domain. Select the temporary domain option, then click "Continue".
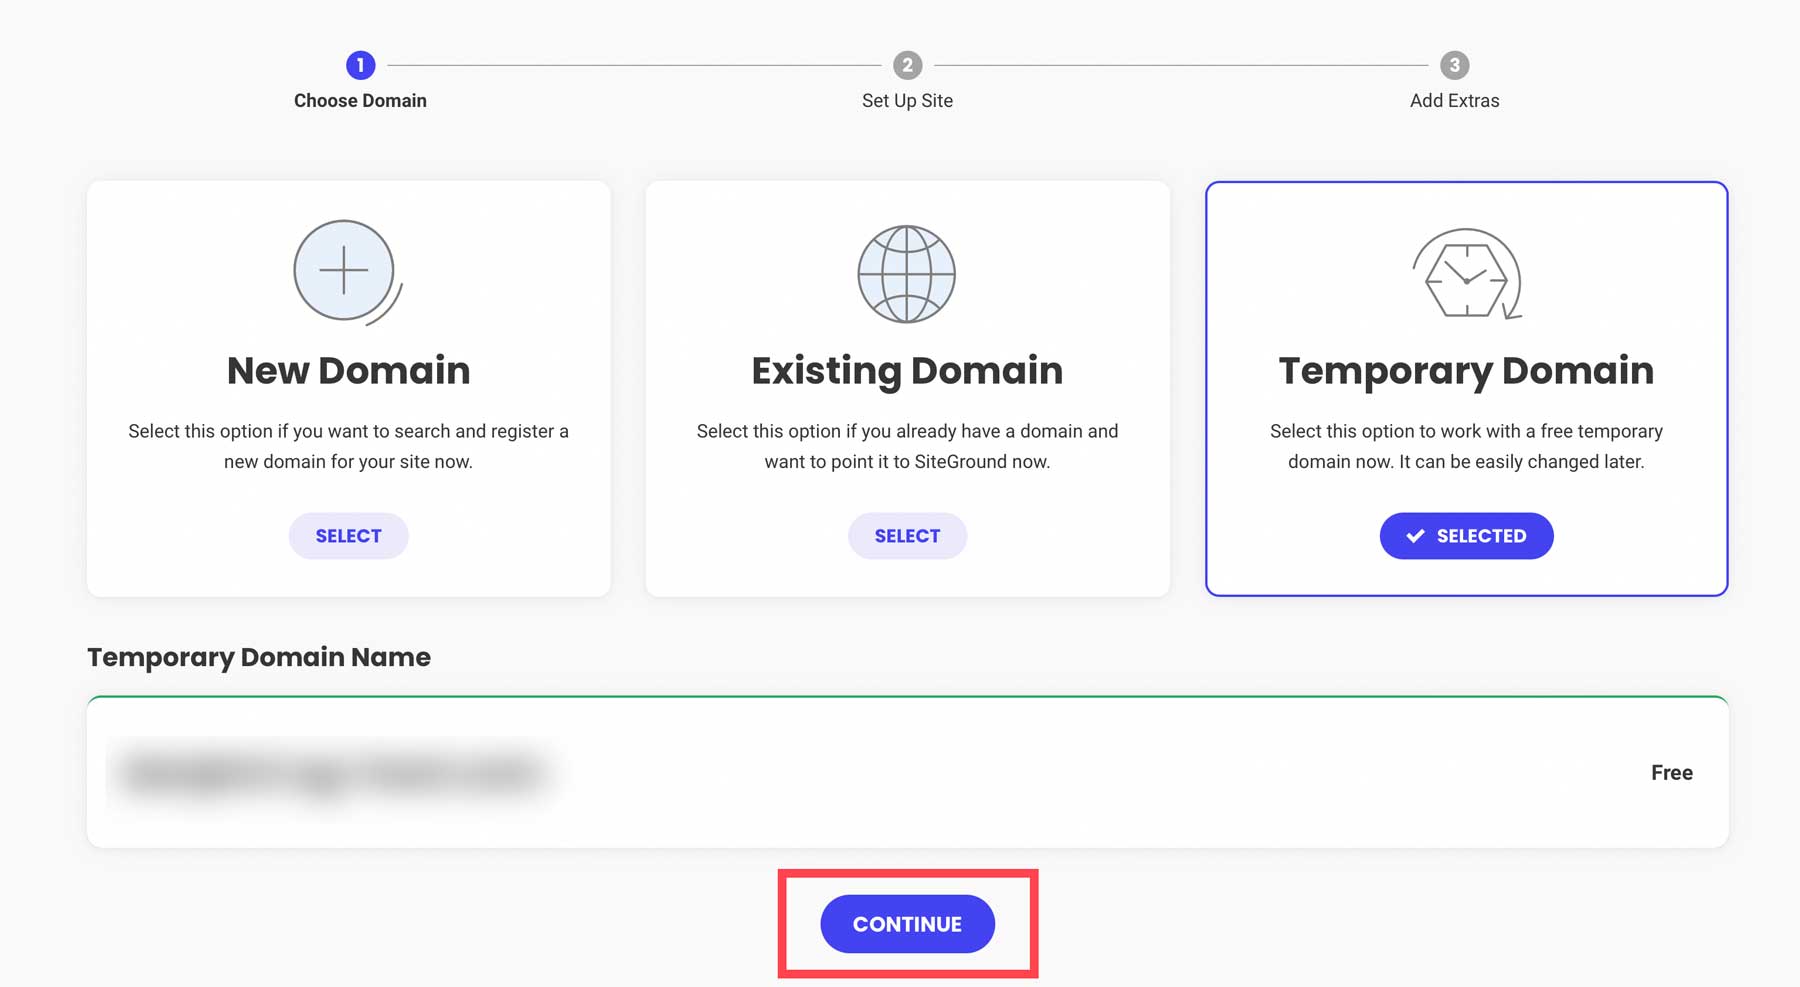
SiteGround will assign a temporary domain to your WordPress installation. To proceed, click "Continue".
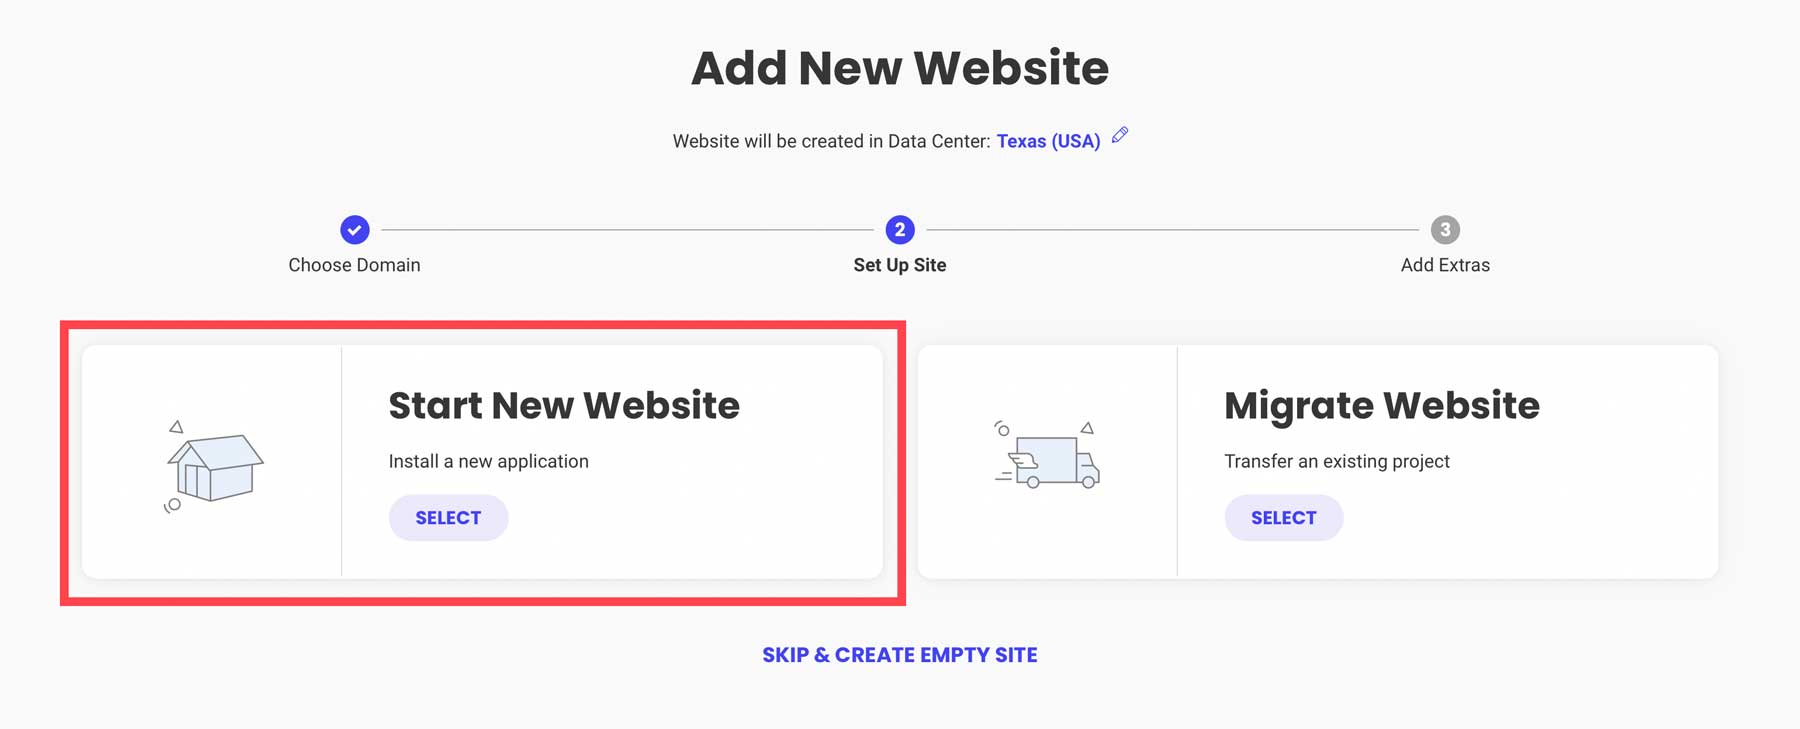
Next, click "Start new website".
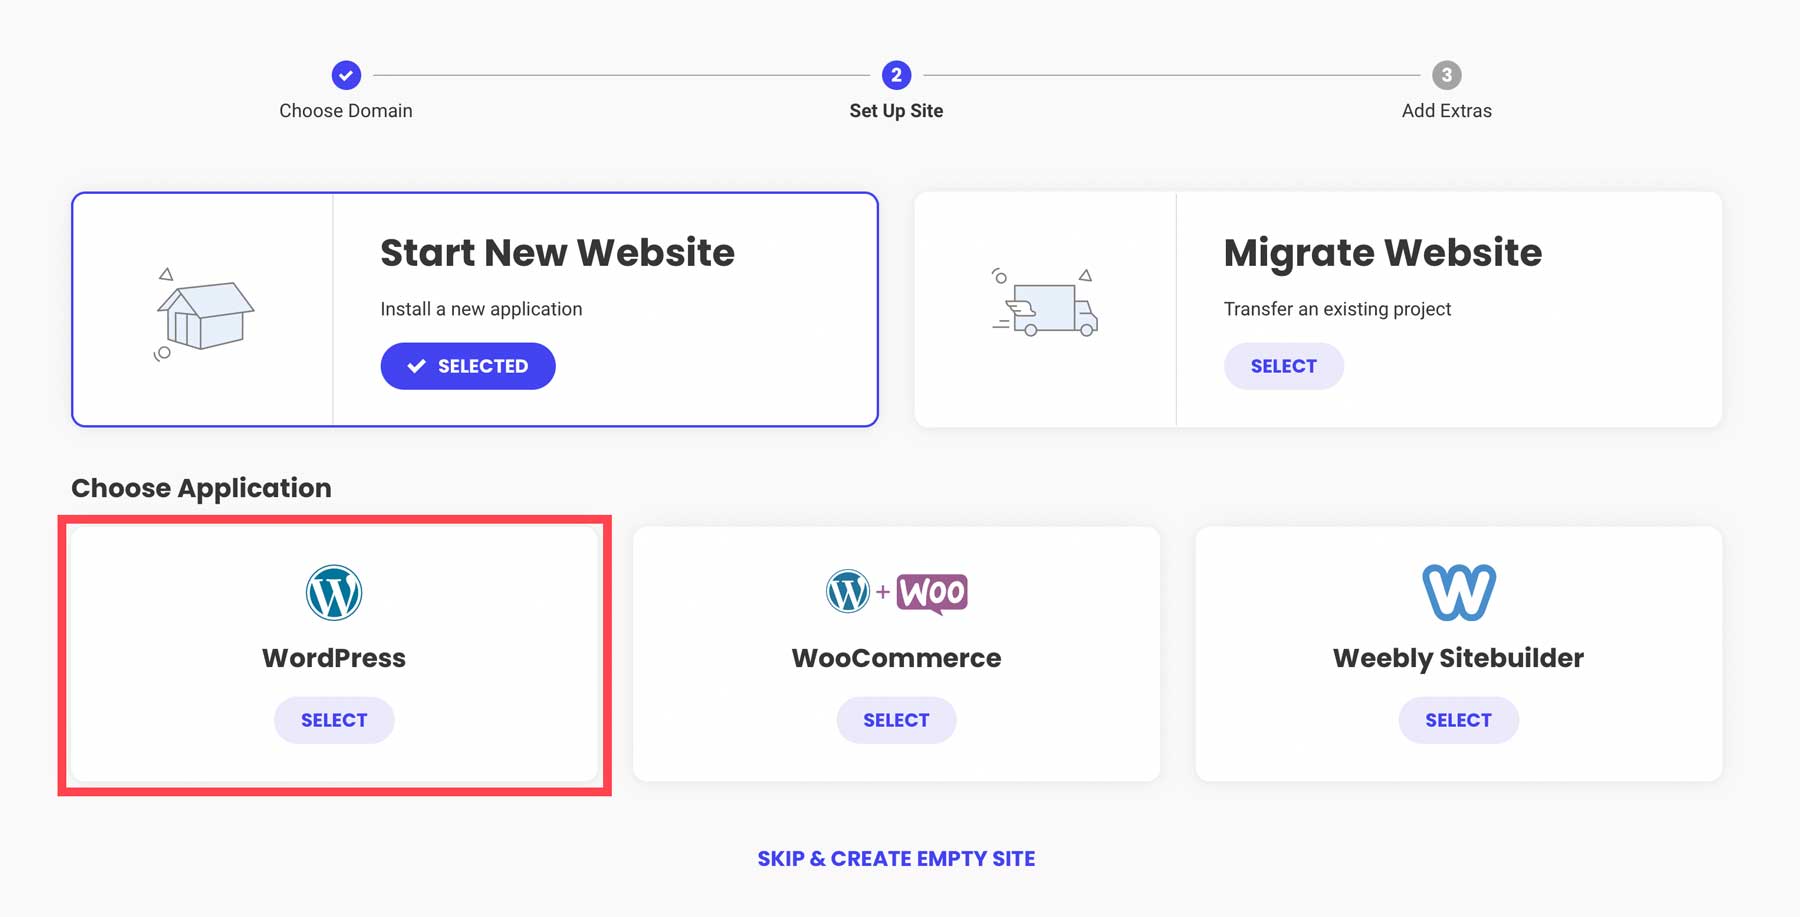
Select WordPress.
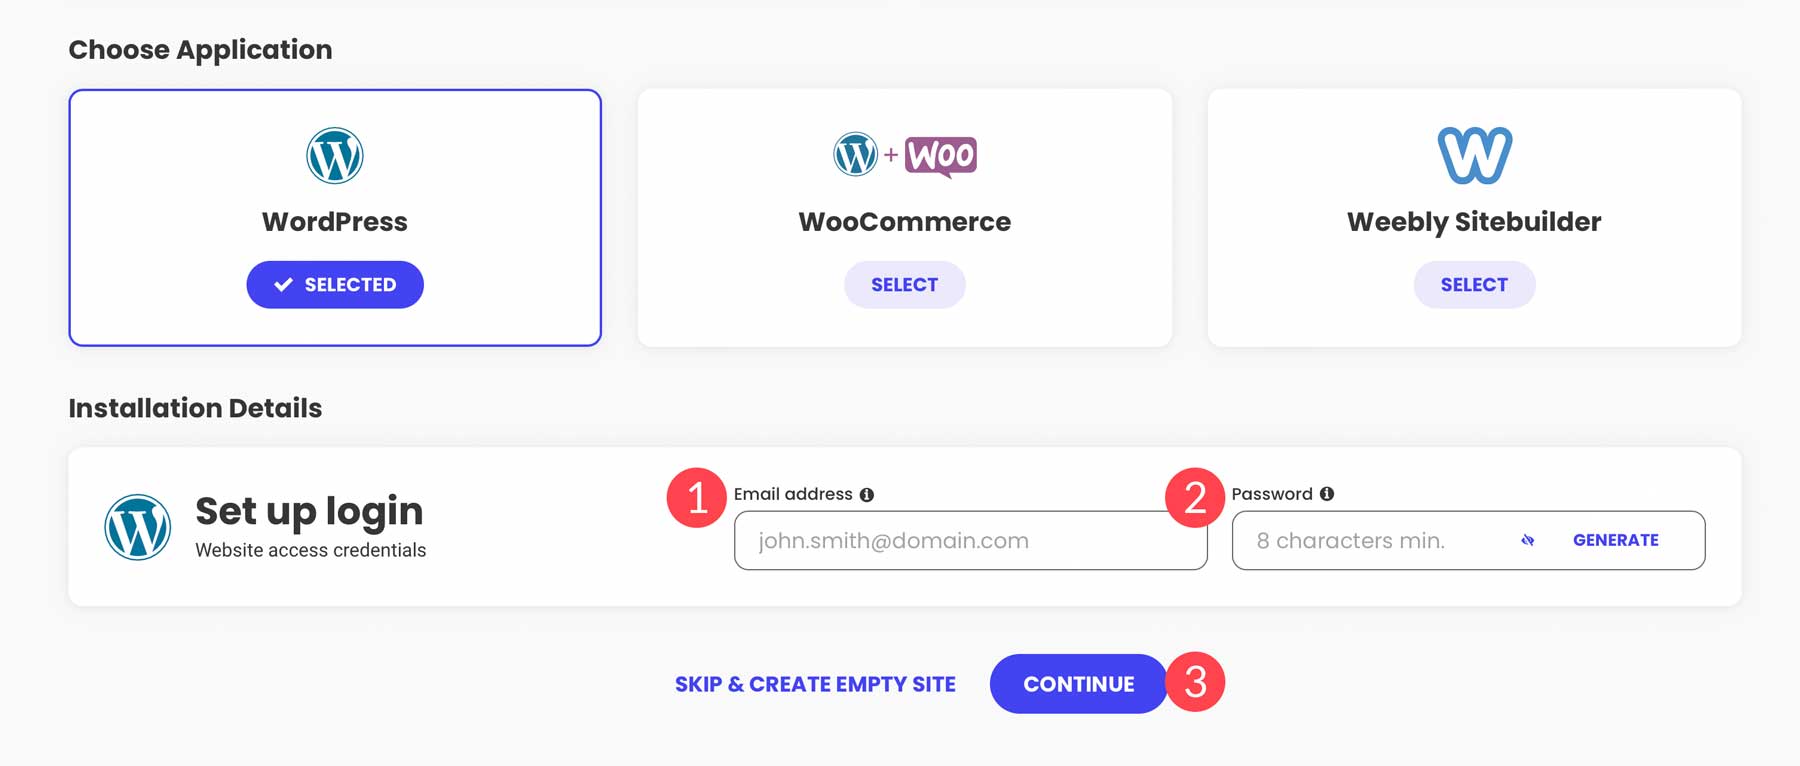
The next step allows you to create your login credentials, which you'll use to access your WordPress dashboard. Make sure to note down or save your login information for future reference. Click "Continue" to proceed to the next step.
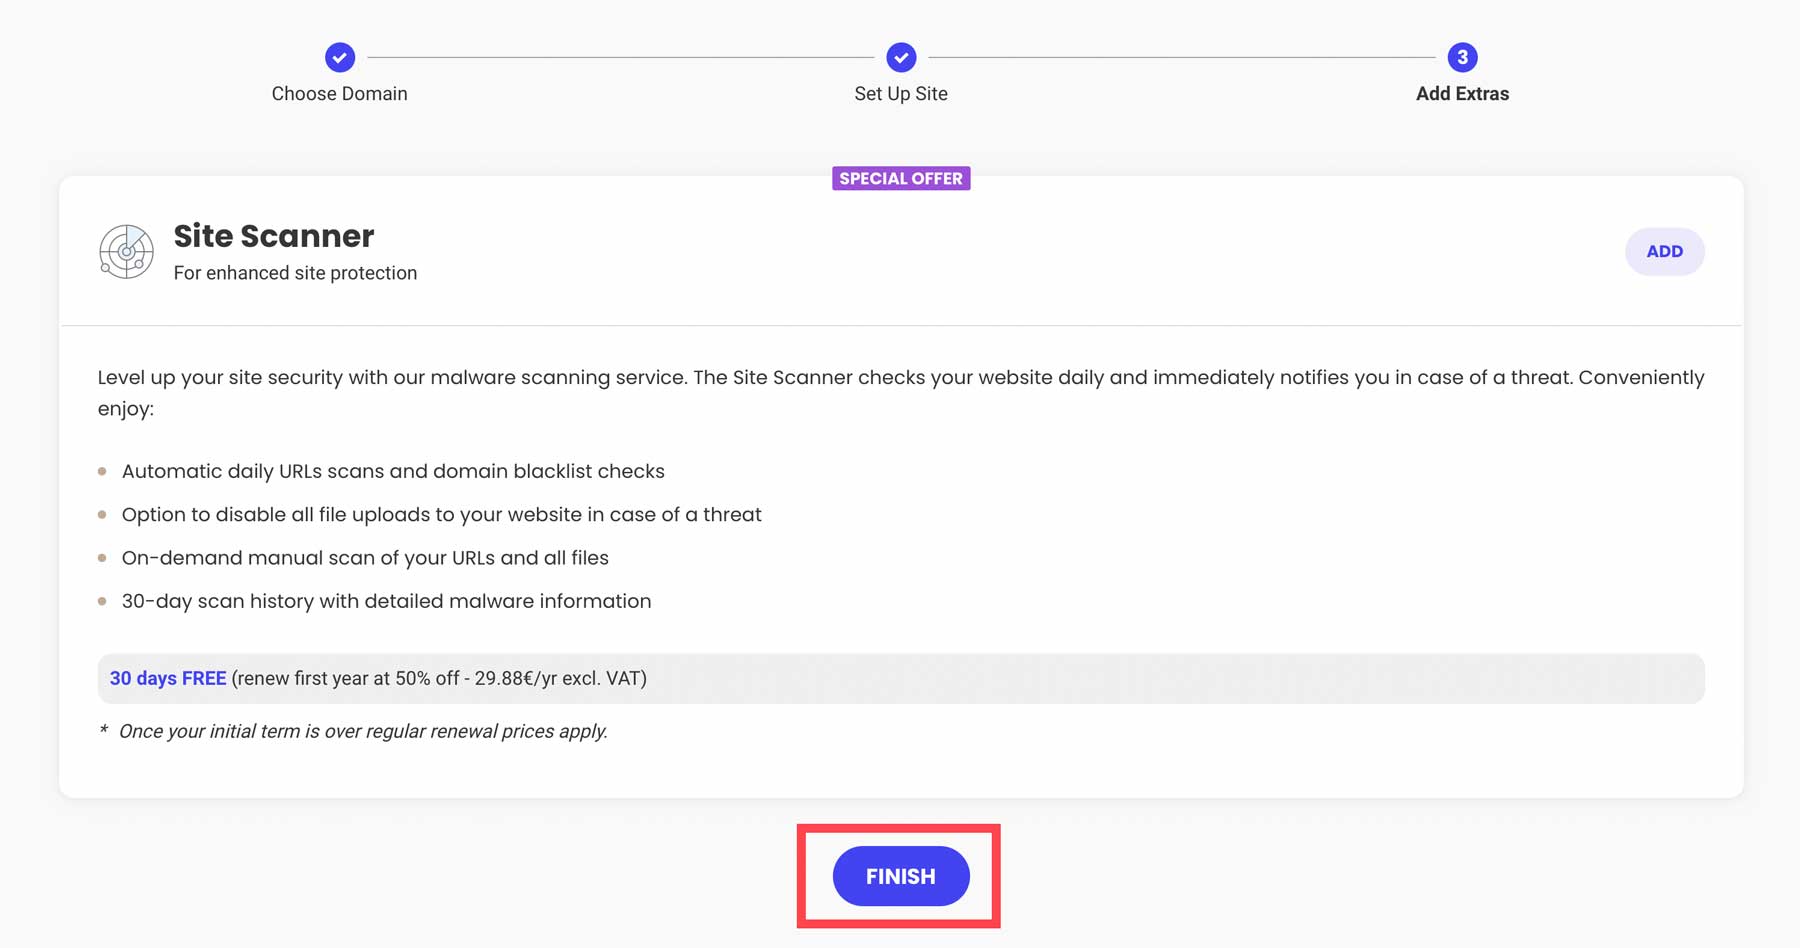
Finally, click the "Finish" button to complete the WordPress installation.
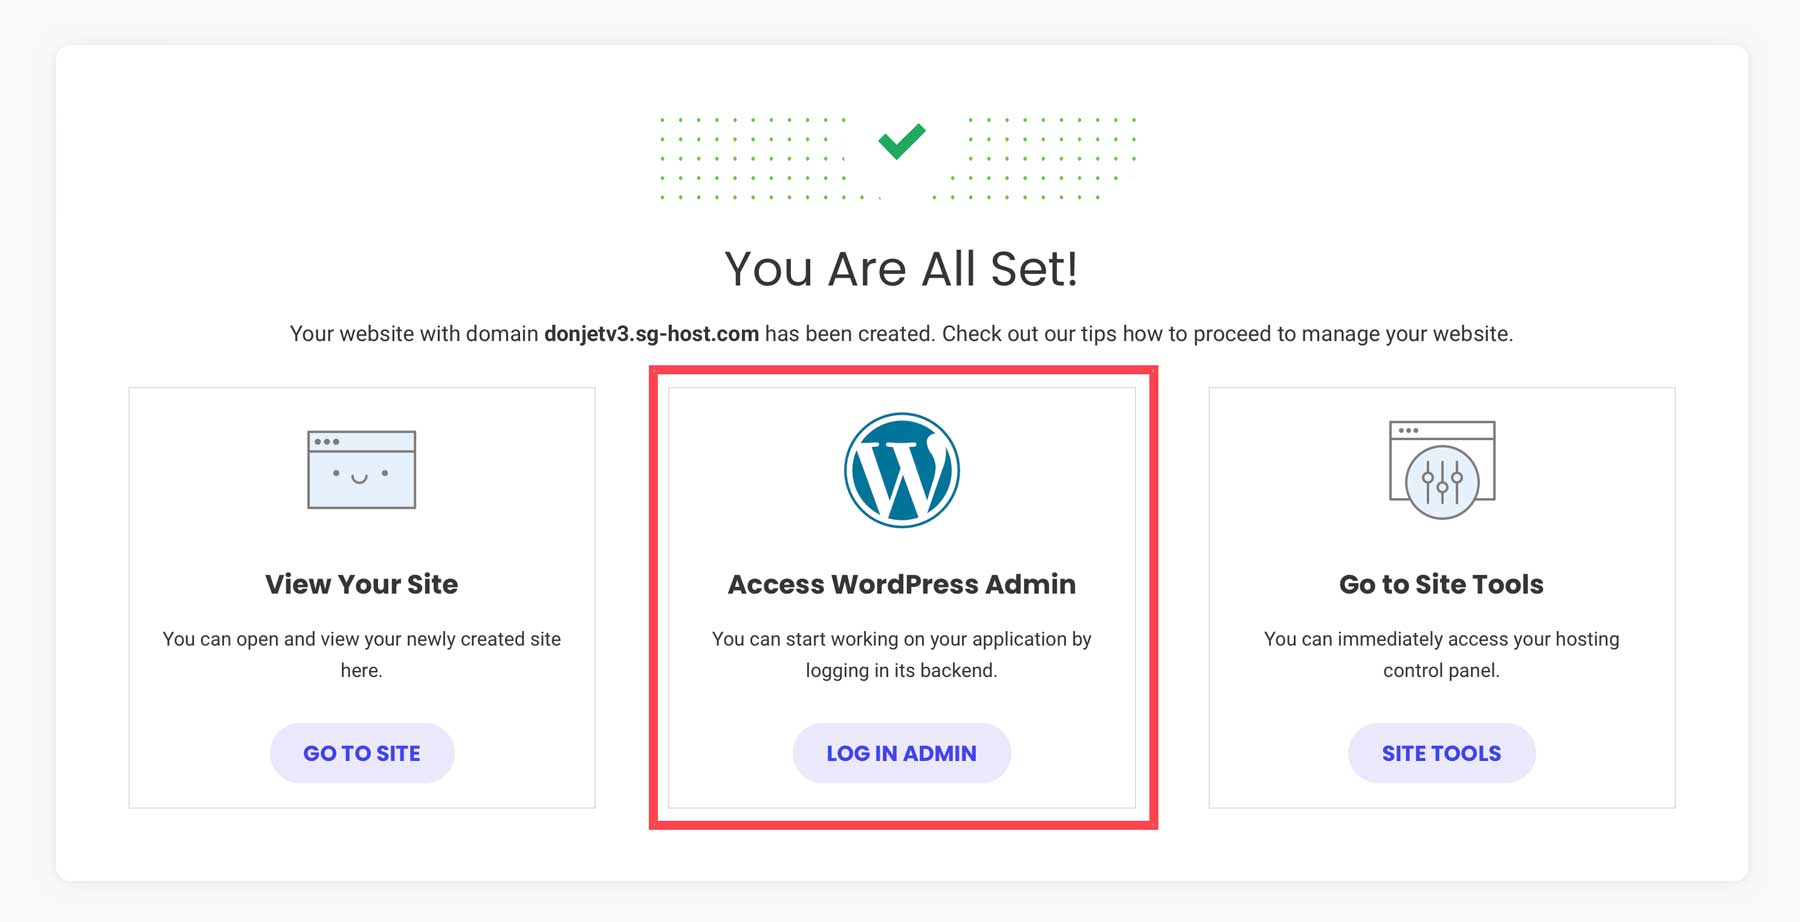
You have two options to access the WordPress dashboard. Through SiteGround, you can click on the "Log in admin" button.
Alternatively, you can log in to WordPress by navigating to www.yoursite.com/wp-admin in your browser. Replace www.yoursite.com with your unique domain.
Step 2: WordPress for Beginners - The Dashboard
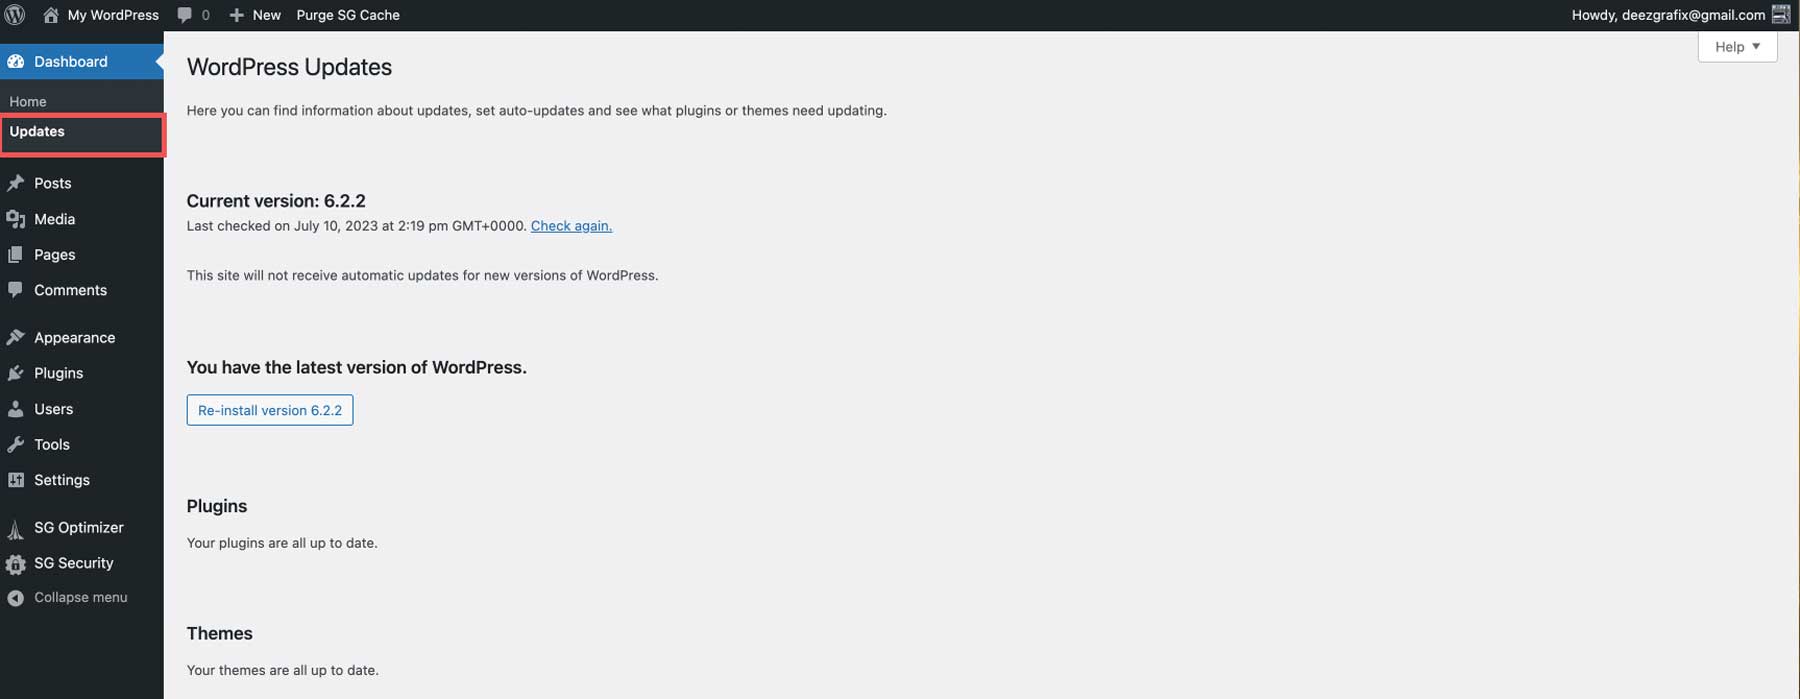
Upon logging in for the first time, you will see the WordPress toolbar on the left side of the screen. It contains all the necessary tools and settings to start building your site. The main dashboard screen provides quick links to view or manage pages, edit your site's design, access useful links, and read WordPress-related blog posts.

The next tab, "Updates," allows you to review any pending updates for plugins, themes, or core files. It's important to keep your software up to date for functionality and security. Ignoring updates can leave your site vulnerable to hackers or potential malfunctions. If you encounter any issues during the update process, make sure to create a backup of your website.
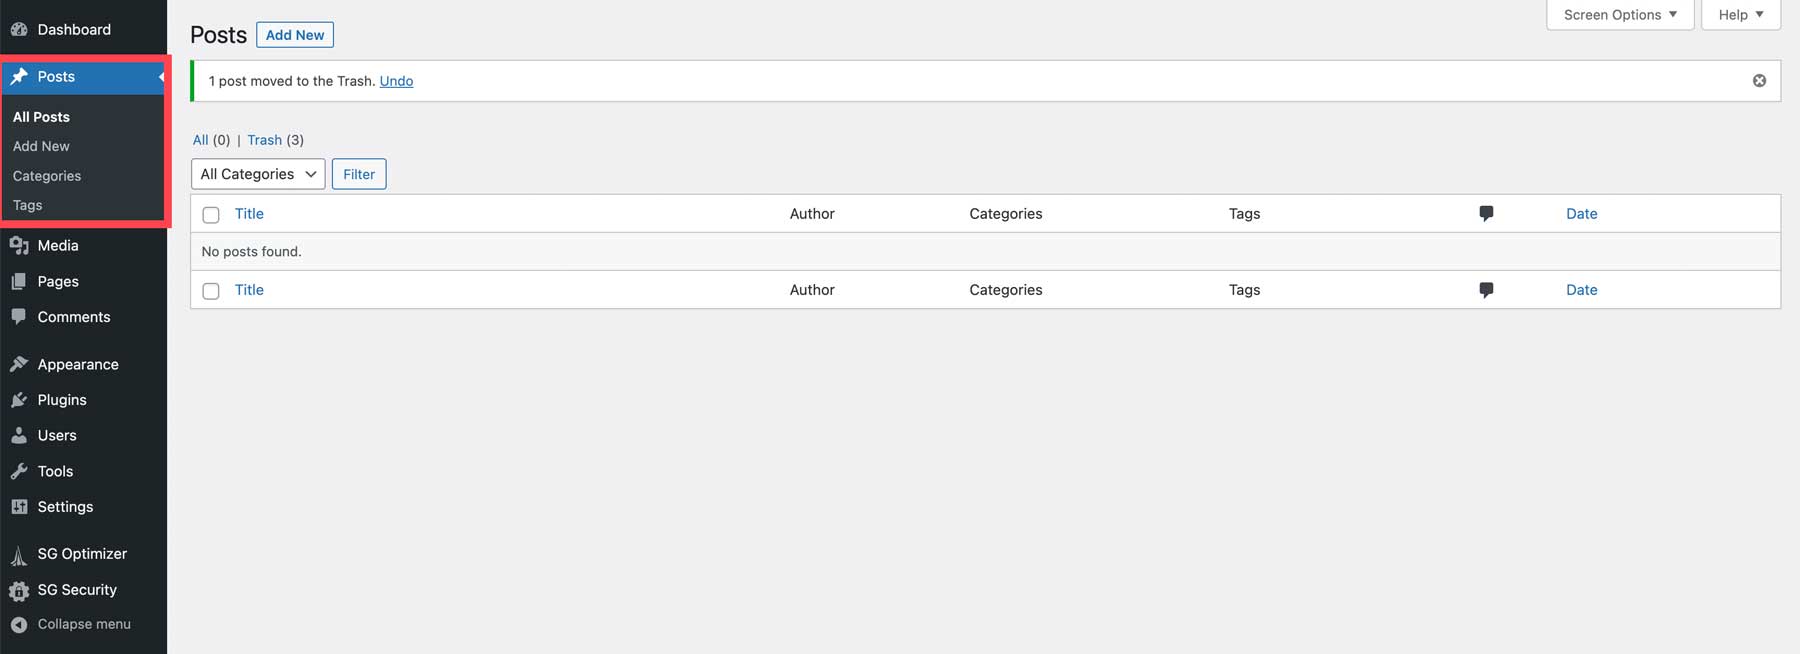
Posts
The "Posts" tab is where you can create new posts or edit existing ones. You can also set up categories and tags for your blog, helping organize your content, improve SEO, and enhance user experience.
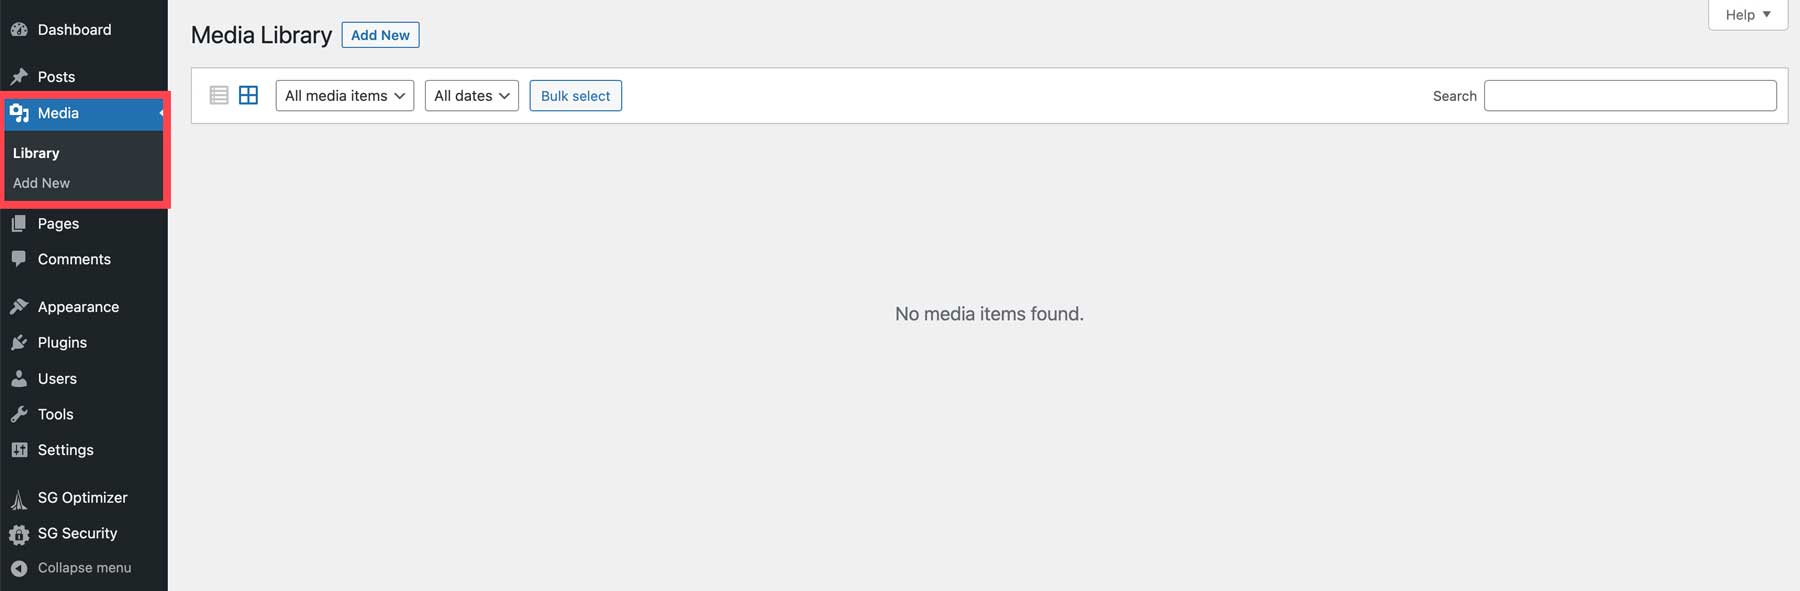
Media
WordPress includes a built-in media library, allowing you to add and manage images for your website.
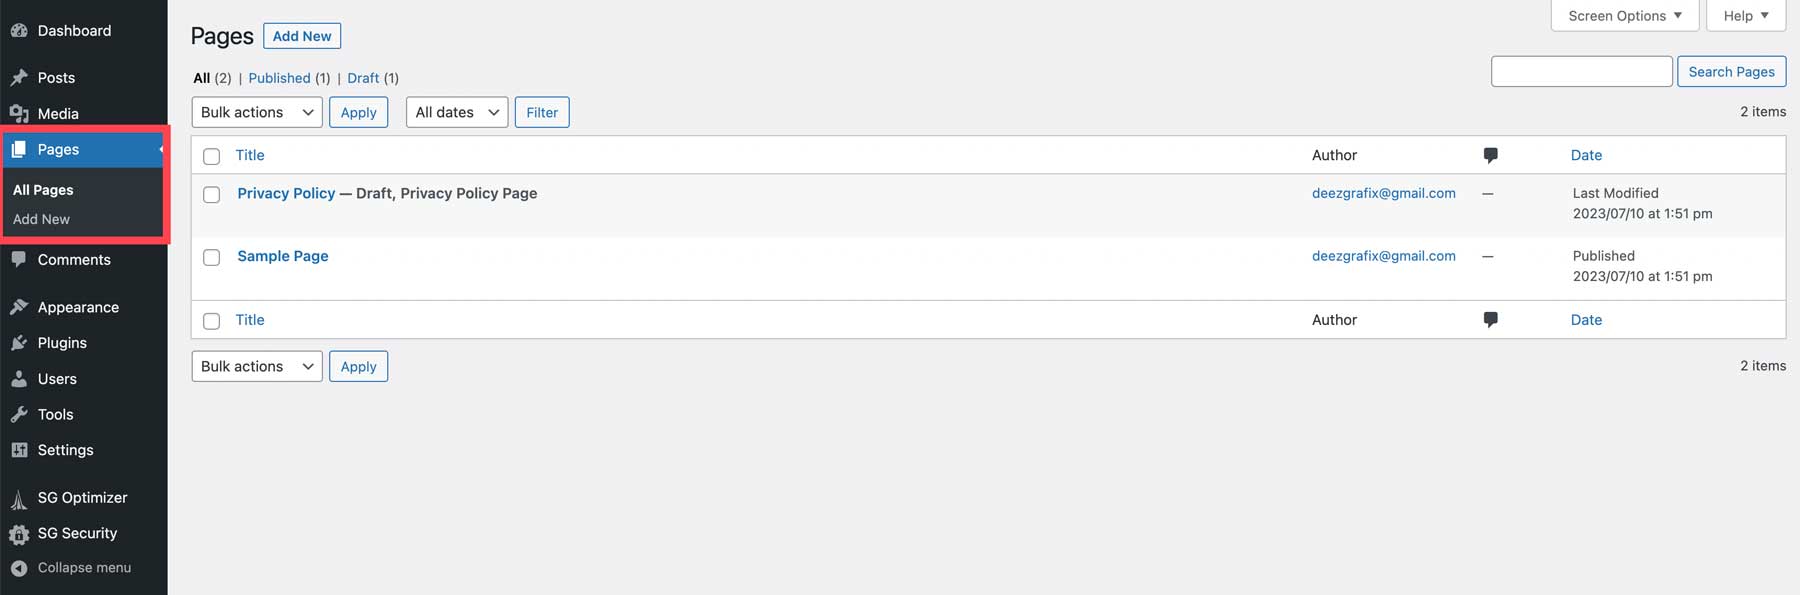
Pages
The "Pages" section enables you to add new pages to your website. While pages are created similarly to posts, there are differences between the two. Pages appear in the main navigation menu, allowing visitors to easily navigate your content. Unlike posts, pages do not have categories and tags.
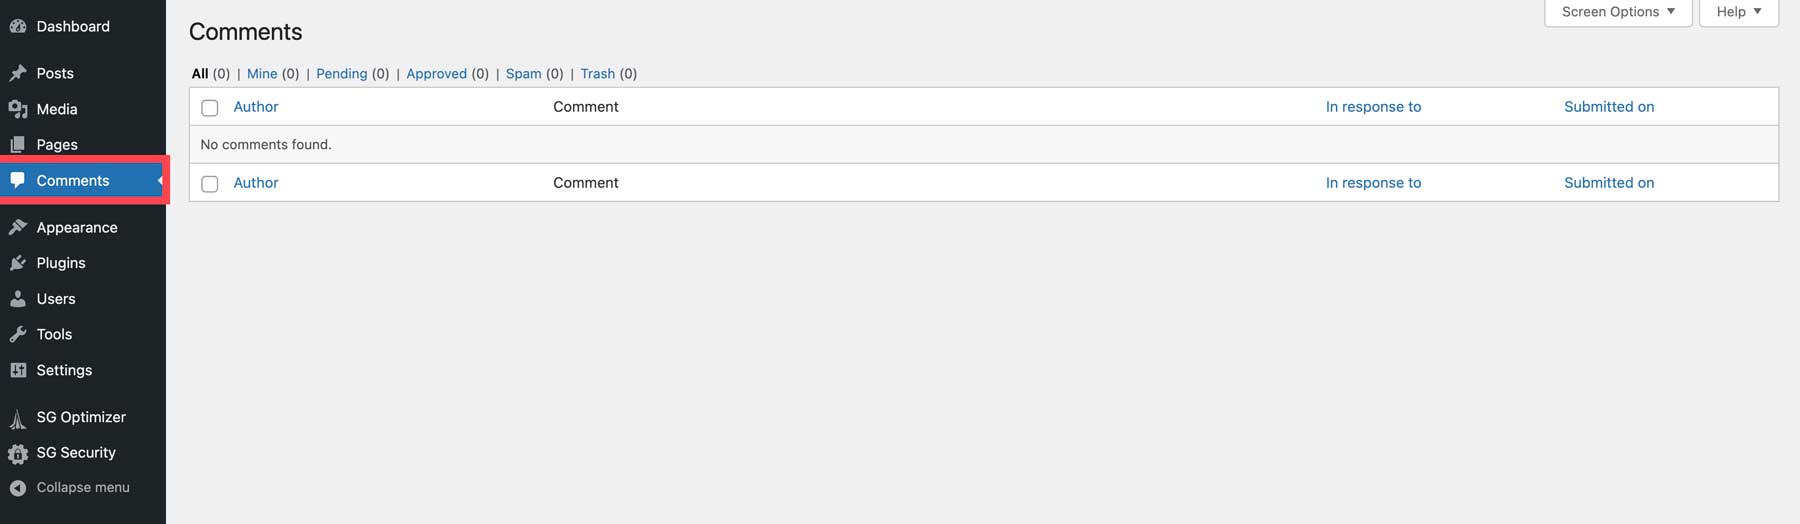
Comments
WordPress provides comment functionality by default. When you publish posts, visitors can leave comments, providing engagement and interaction. However, it's important to effectively manage and moderate comments for a positive user experience.
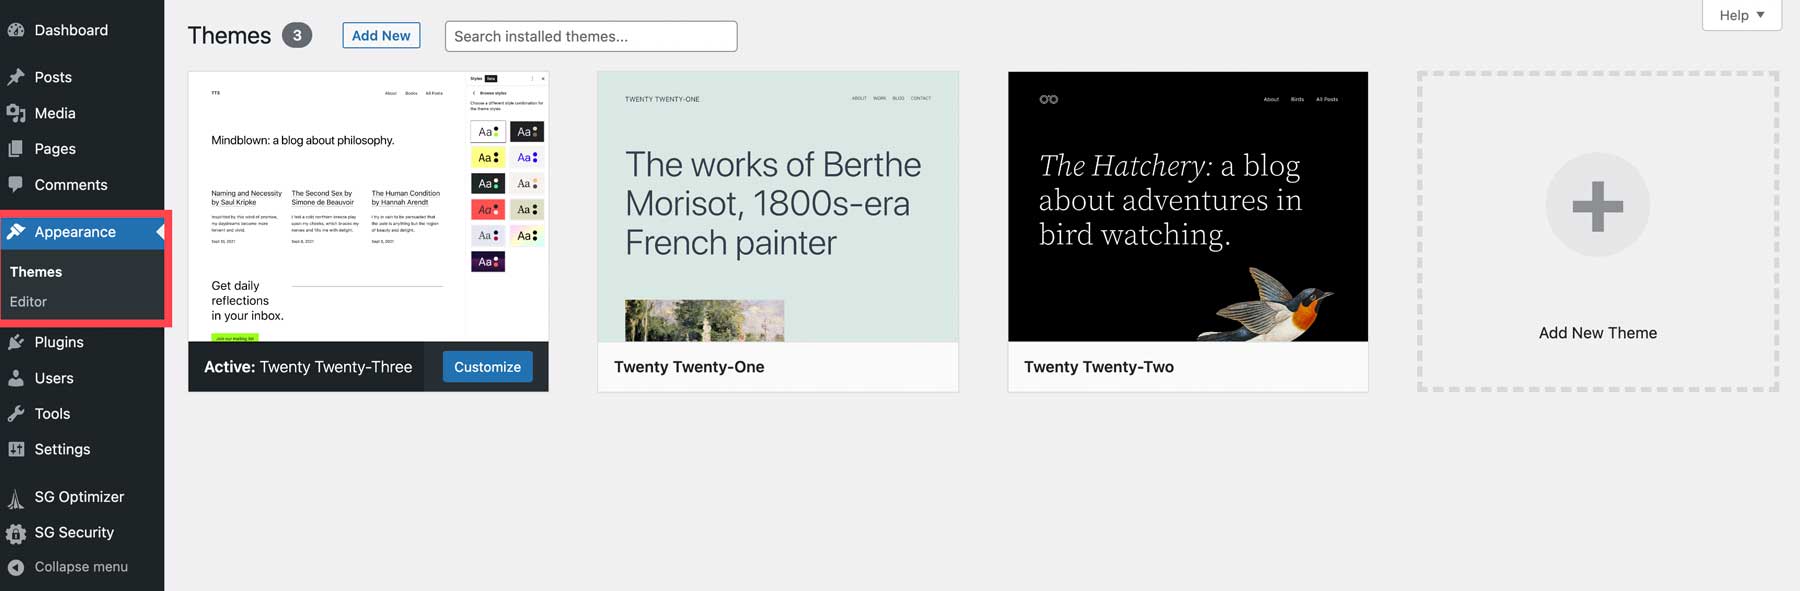
Appearance
The "Appearance" tab contains various useful tools for customization. Here, you can install themes, customize them, add widgets, create navigation menus, and more. The available options may vary depending on the theme you are using. More advanced themes, such as Divi, offer extensive customization options, including the ability to edit theme files.
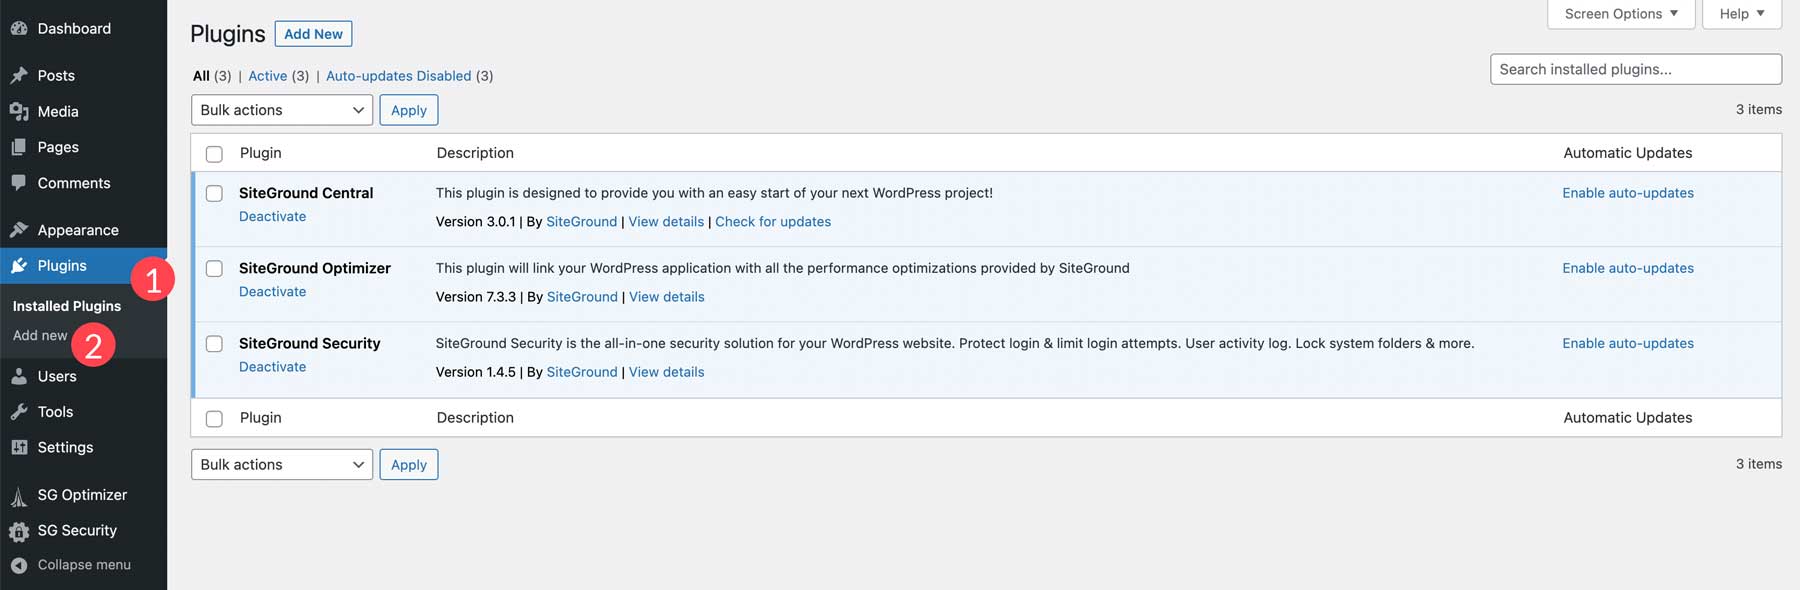
Plugins
WordPress offers plugins to extend its functionality. They allow you to add various features, from live chat support to performance optimization. The "Plugins" tab displays the plugins currently installed on your website. You can view, manage, or delete plugins as needed. Additionally, you can search for and install new plugins from the WordPress repository or upload premium plugins. Depending on your theme, there may be a plugin editor option to make coding changes to activated plugins.
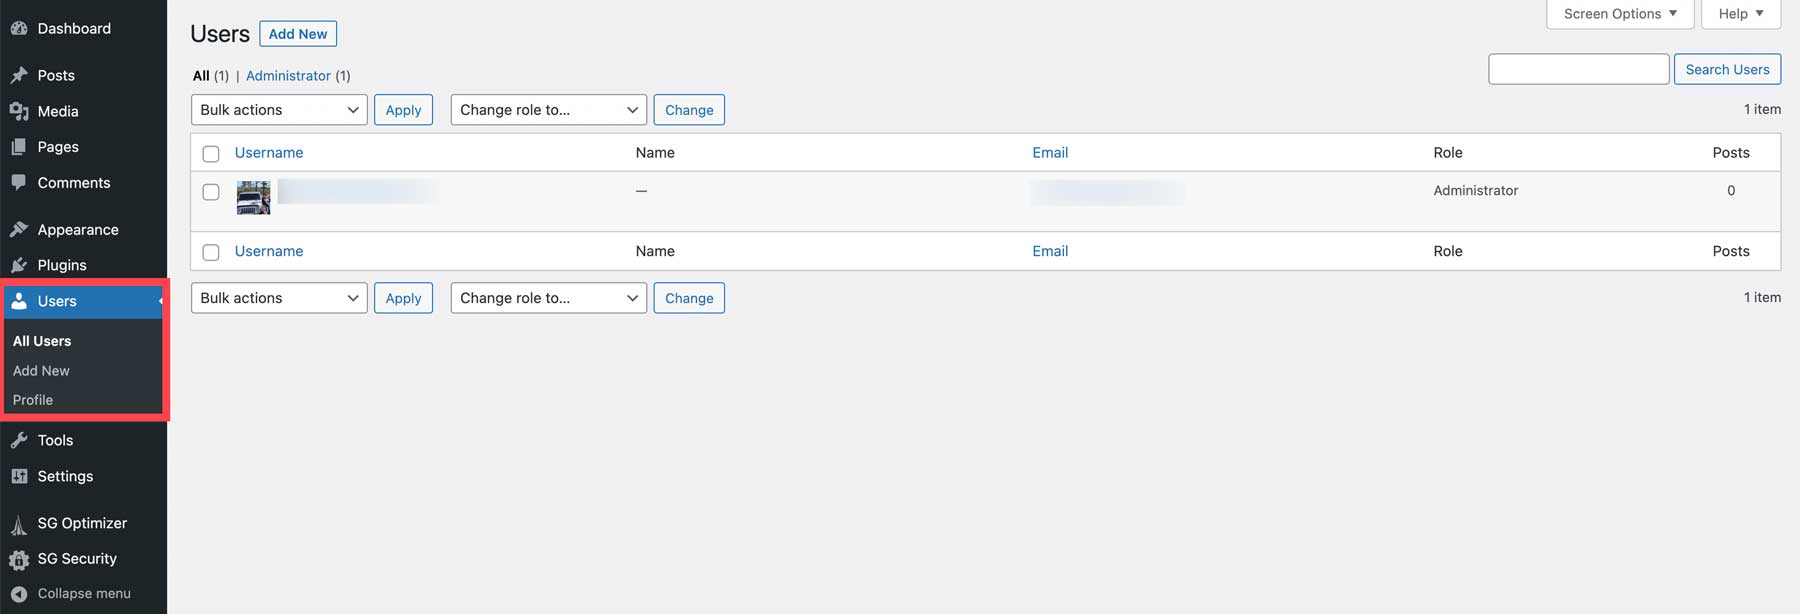
Users
The "Users" section allows you to manage the users of your website. You can add, edit, or delete users and specify their roles and permissions. The profile option lets you customize each user's information and settings. Additionally, you can enhance user functionalities with membership plugins to restrict access to certain content based on membership levels.
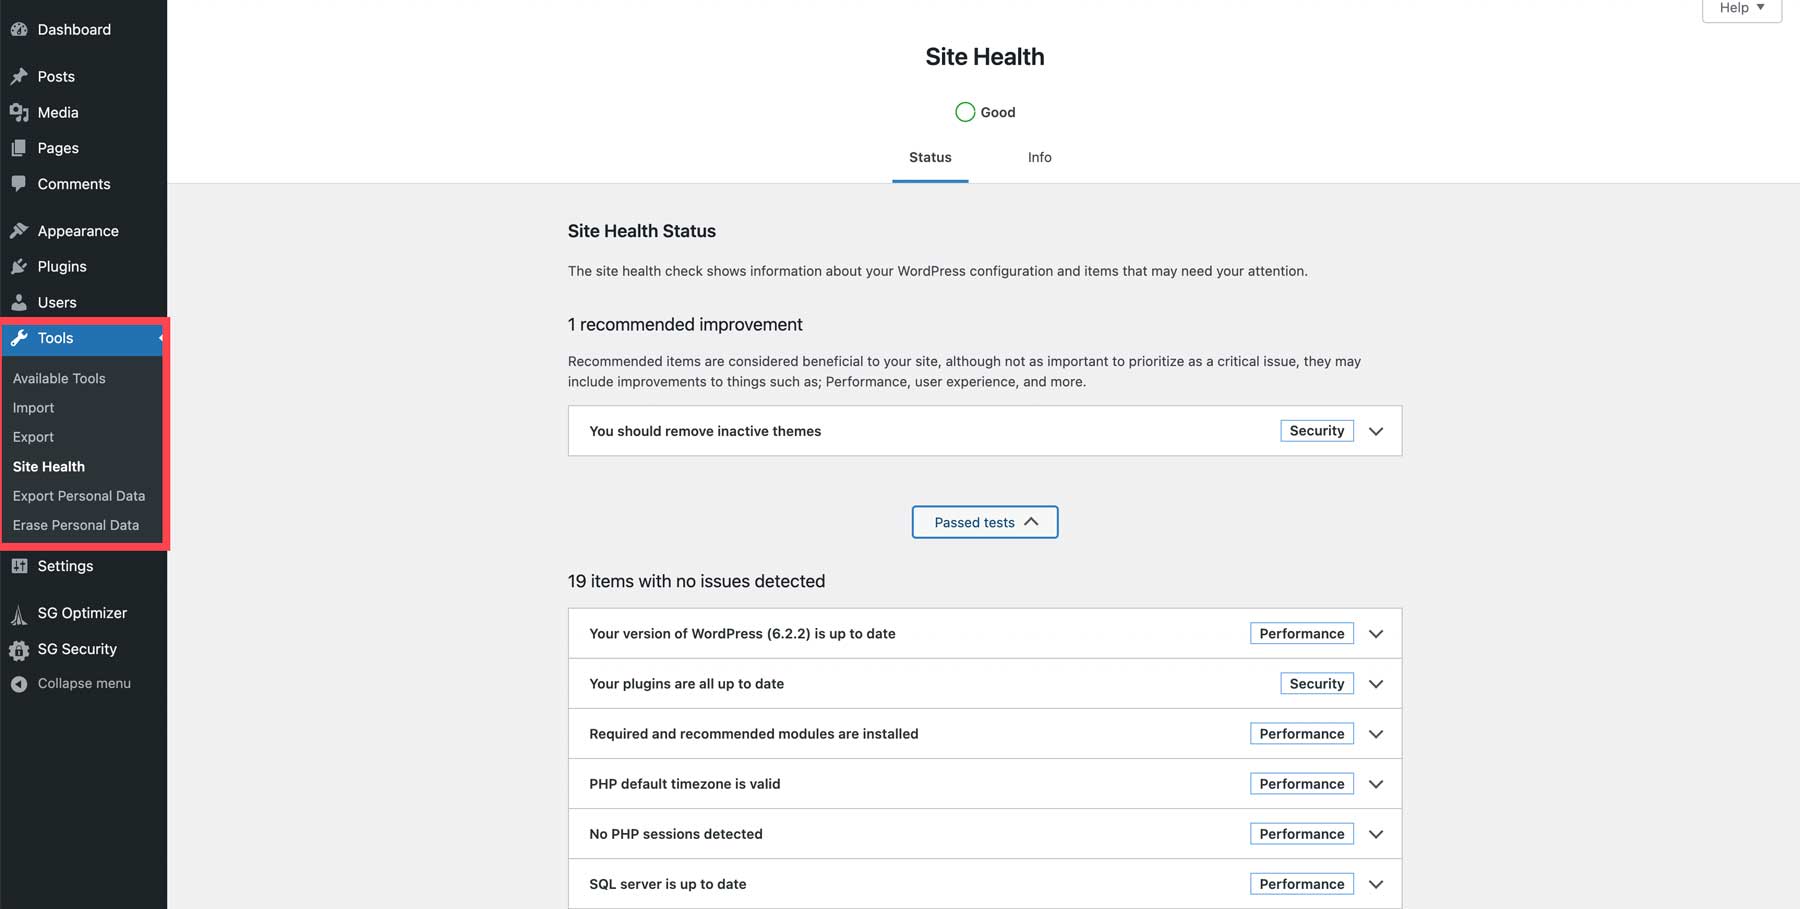
Tools
The "Tools" section offers features to manage and maintain your website. You can browse available tools, import or export website data, monitor security and performance, and comply with GDPR regulations by exporting or erasing users' personal data.
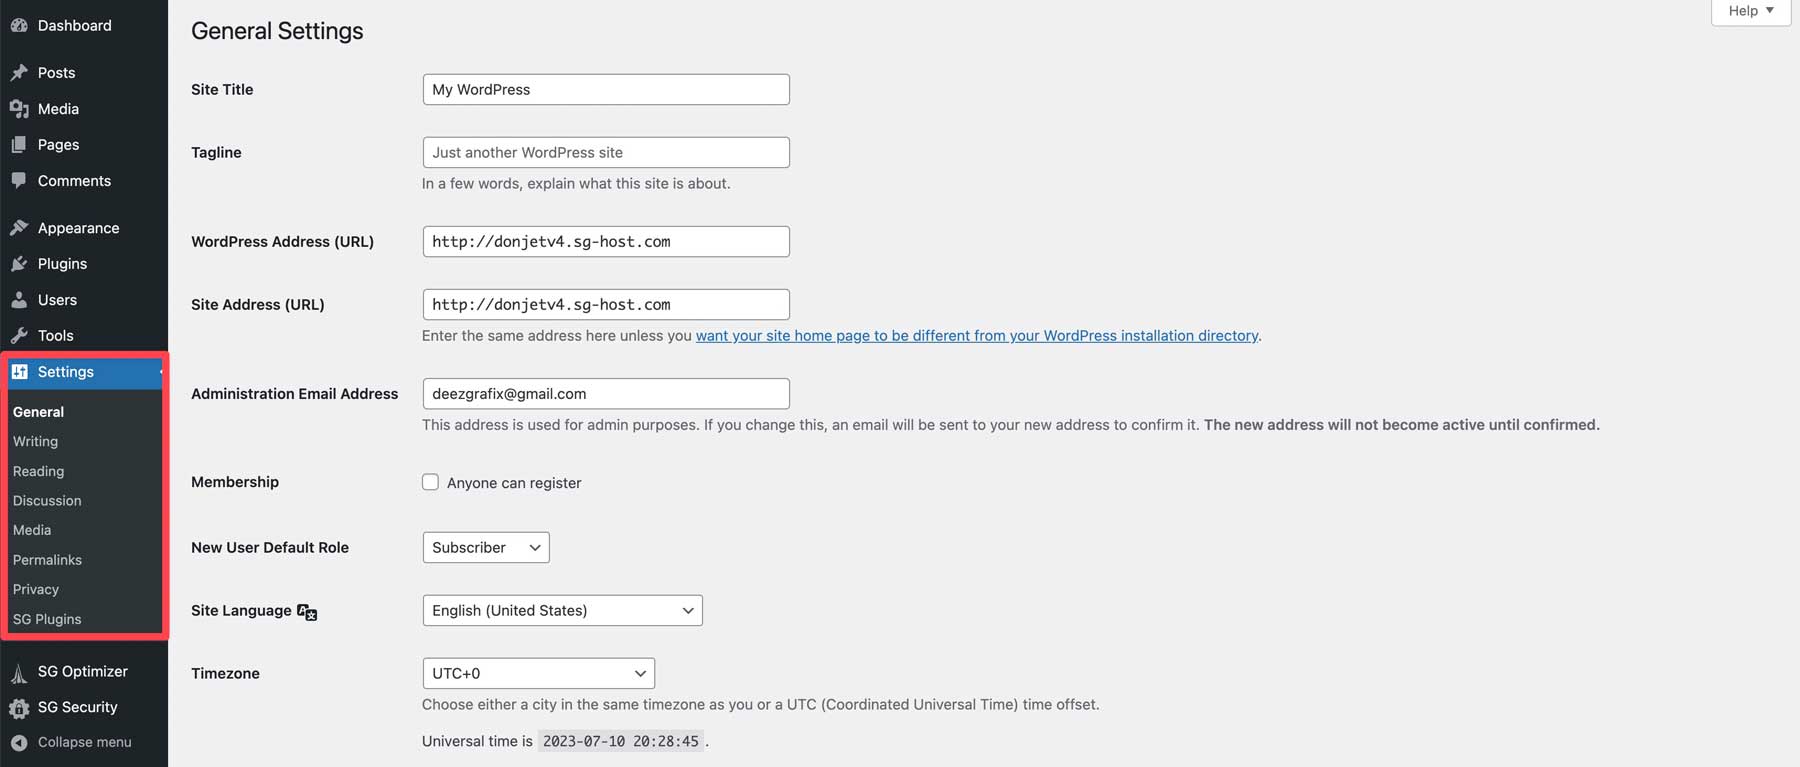
Settings
The "Settings" section allows you to configure various settings for your website. You can set your site's title and tagline, define a home page, adjust media sizes, manage privacy settings, and more. These settings can be complex, so make sure to reference helpful articles or documentation for guidance.
Step 3: WordPress for Beginners - Themes
A WordPress theme defines the appearance of your website. It plays a crucial role in providing a visually engaging experience for visitors. Finding the best WordPress theme for your website is essential. Once you have selected a theme, there are two ways to install it. You can search for and install a free theme from the WordPress directory or upload a premium theme, such as Divi.
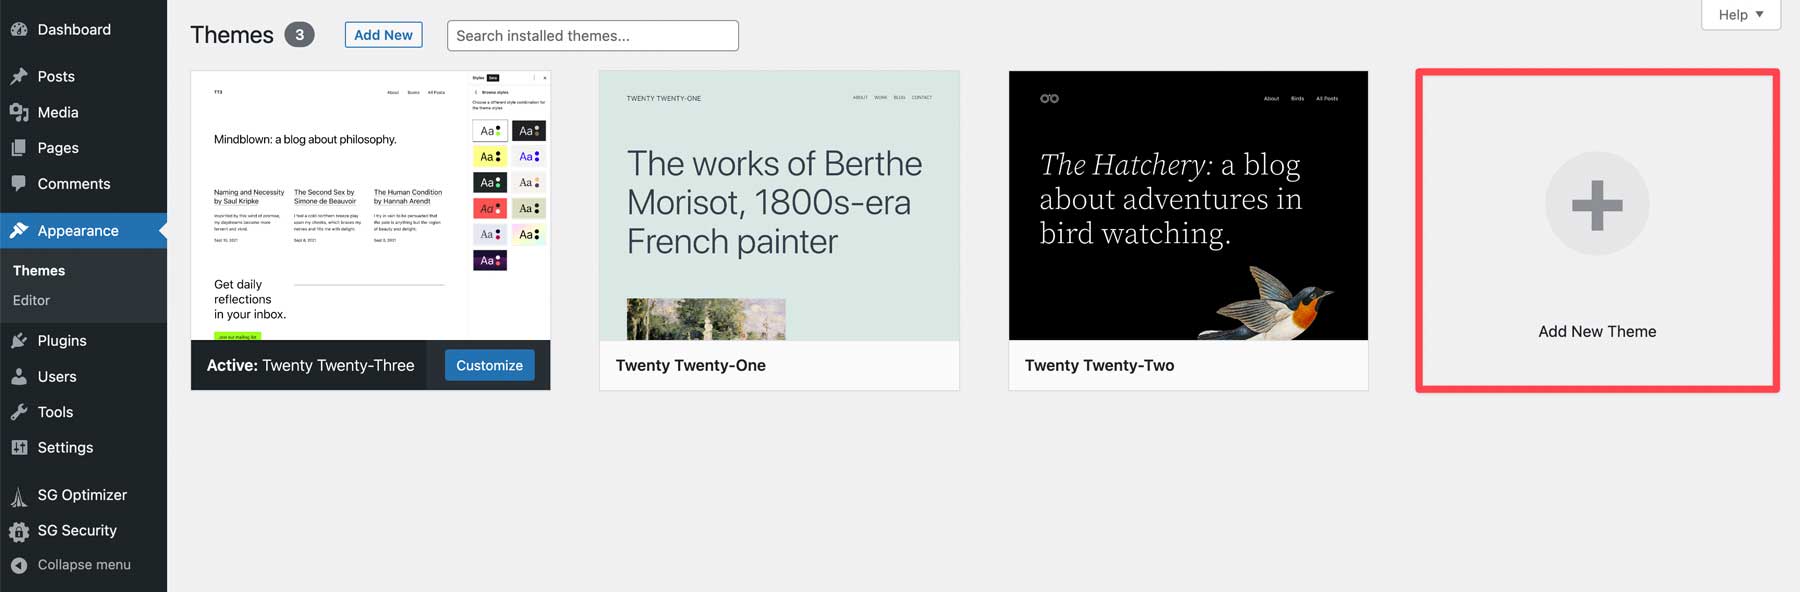
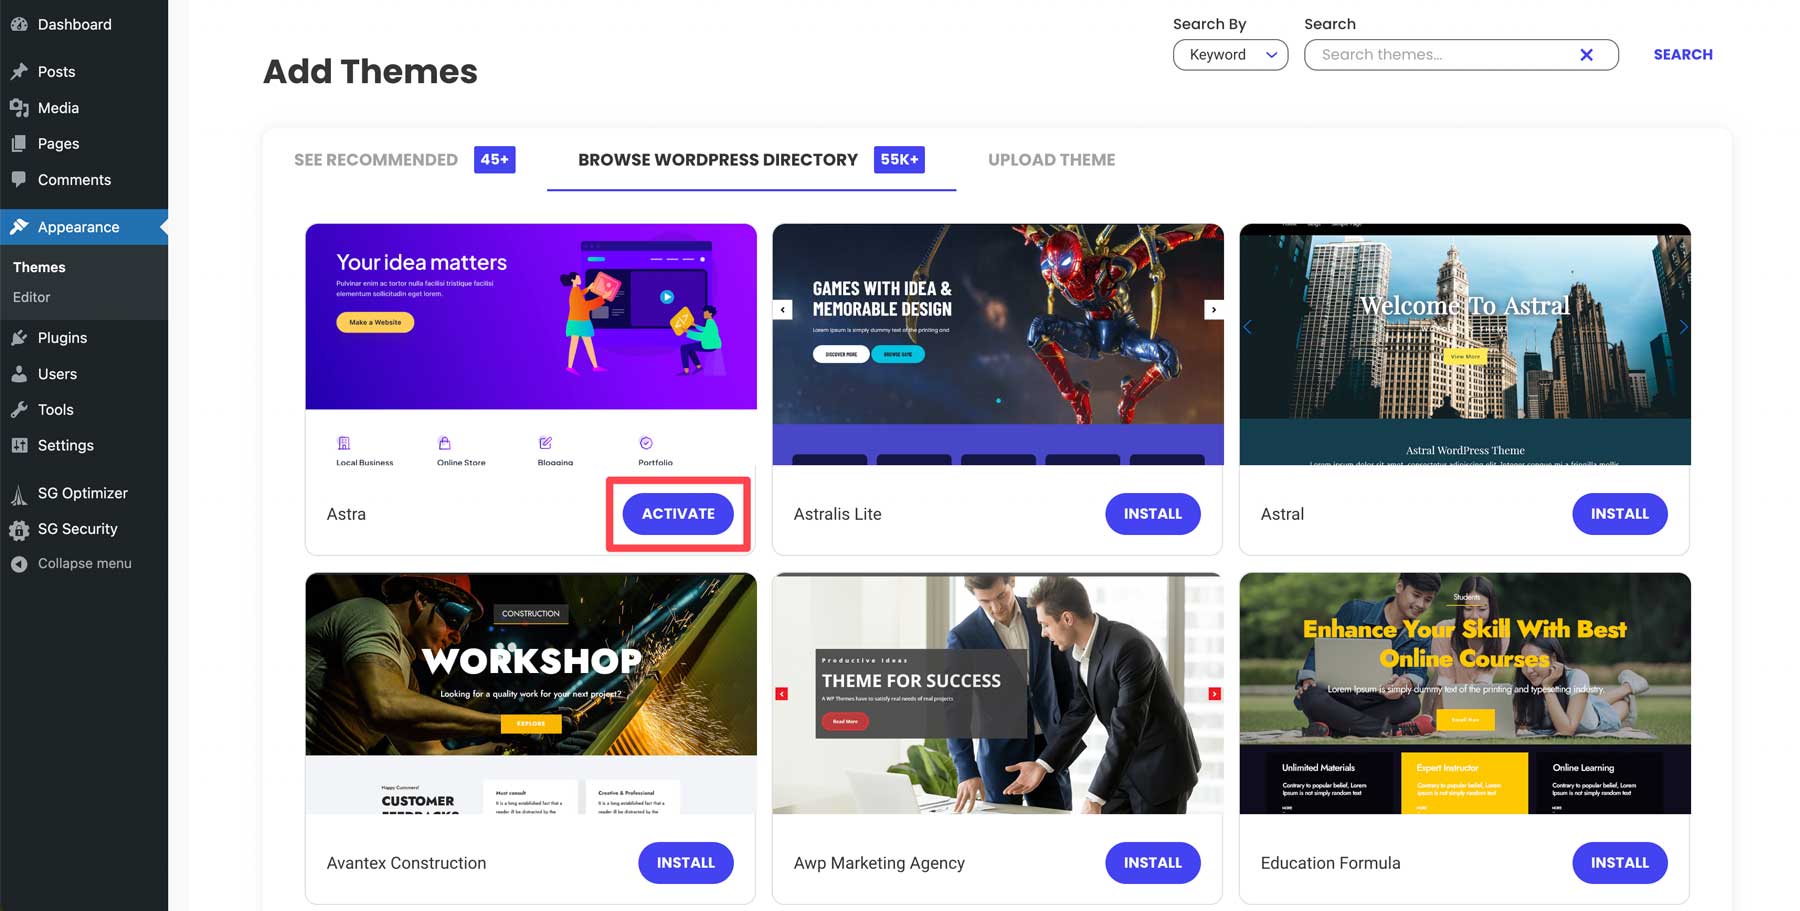
To install a theme, navigate to Appearance > Themes in the WordPress dashboard. Click on "Add New Theme".
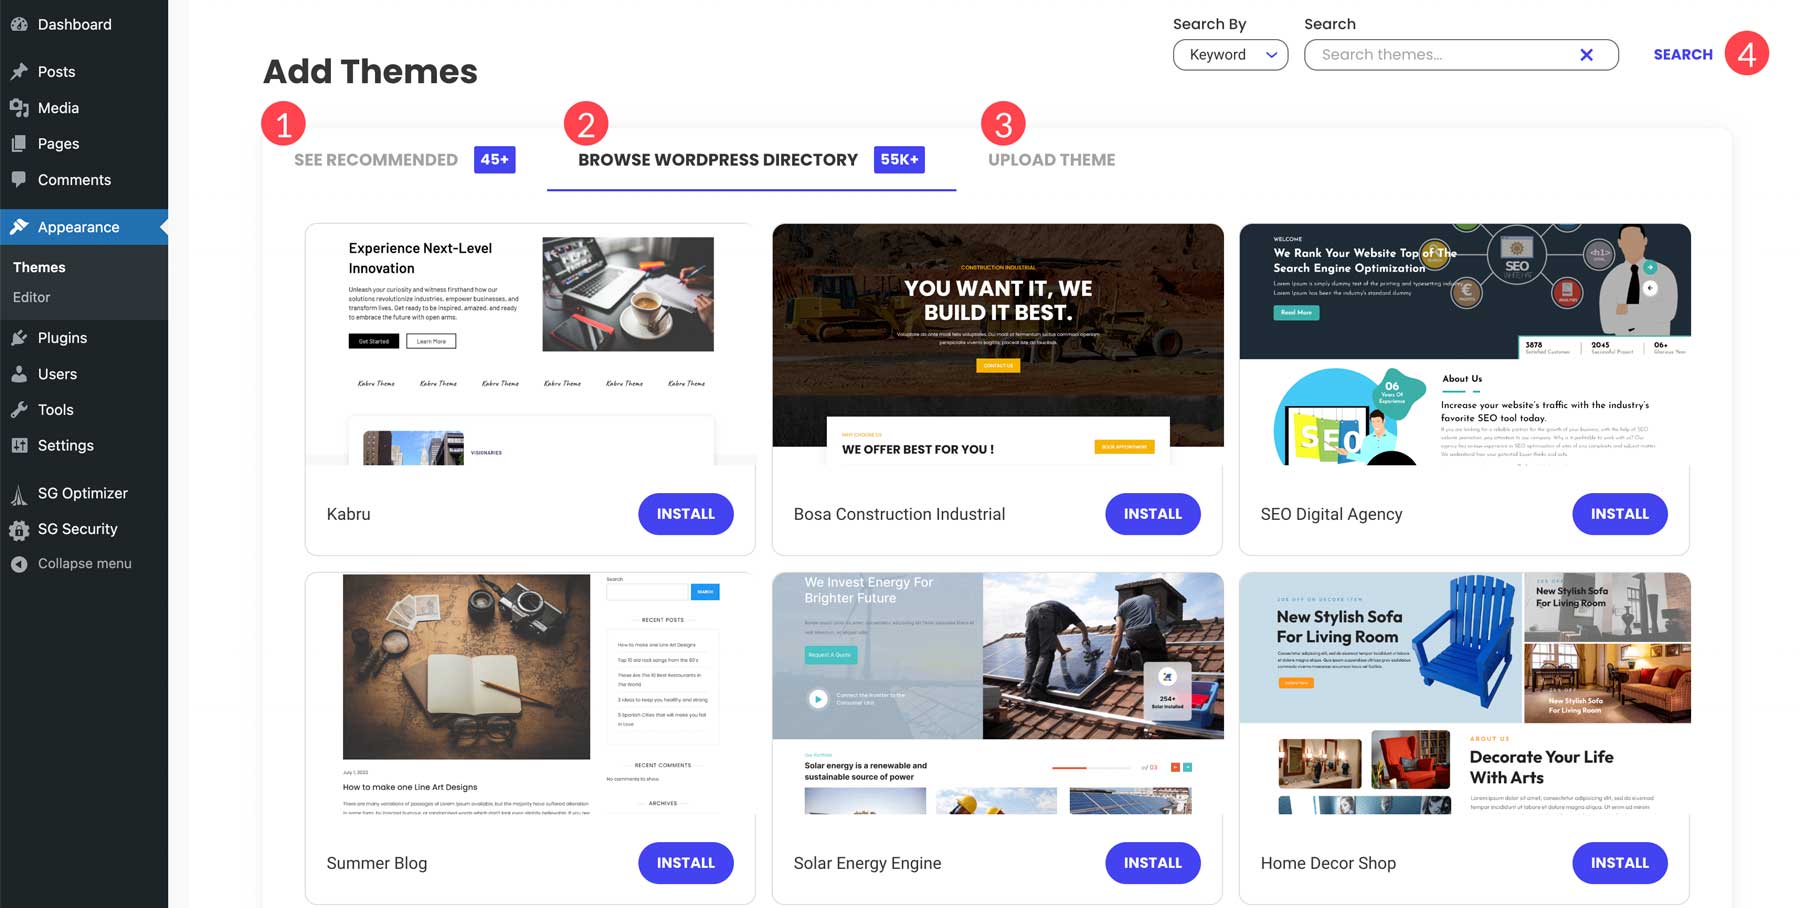
SiteGround offers a choice from recommended themes, browsing the WP directory, or uploading a theme. The options may vary depending on your hosting provider. If you want to search for a theme by keyword, you can use the search bar.
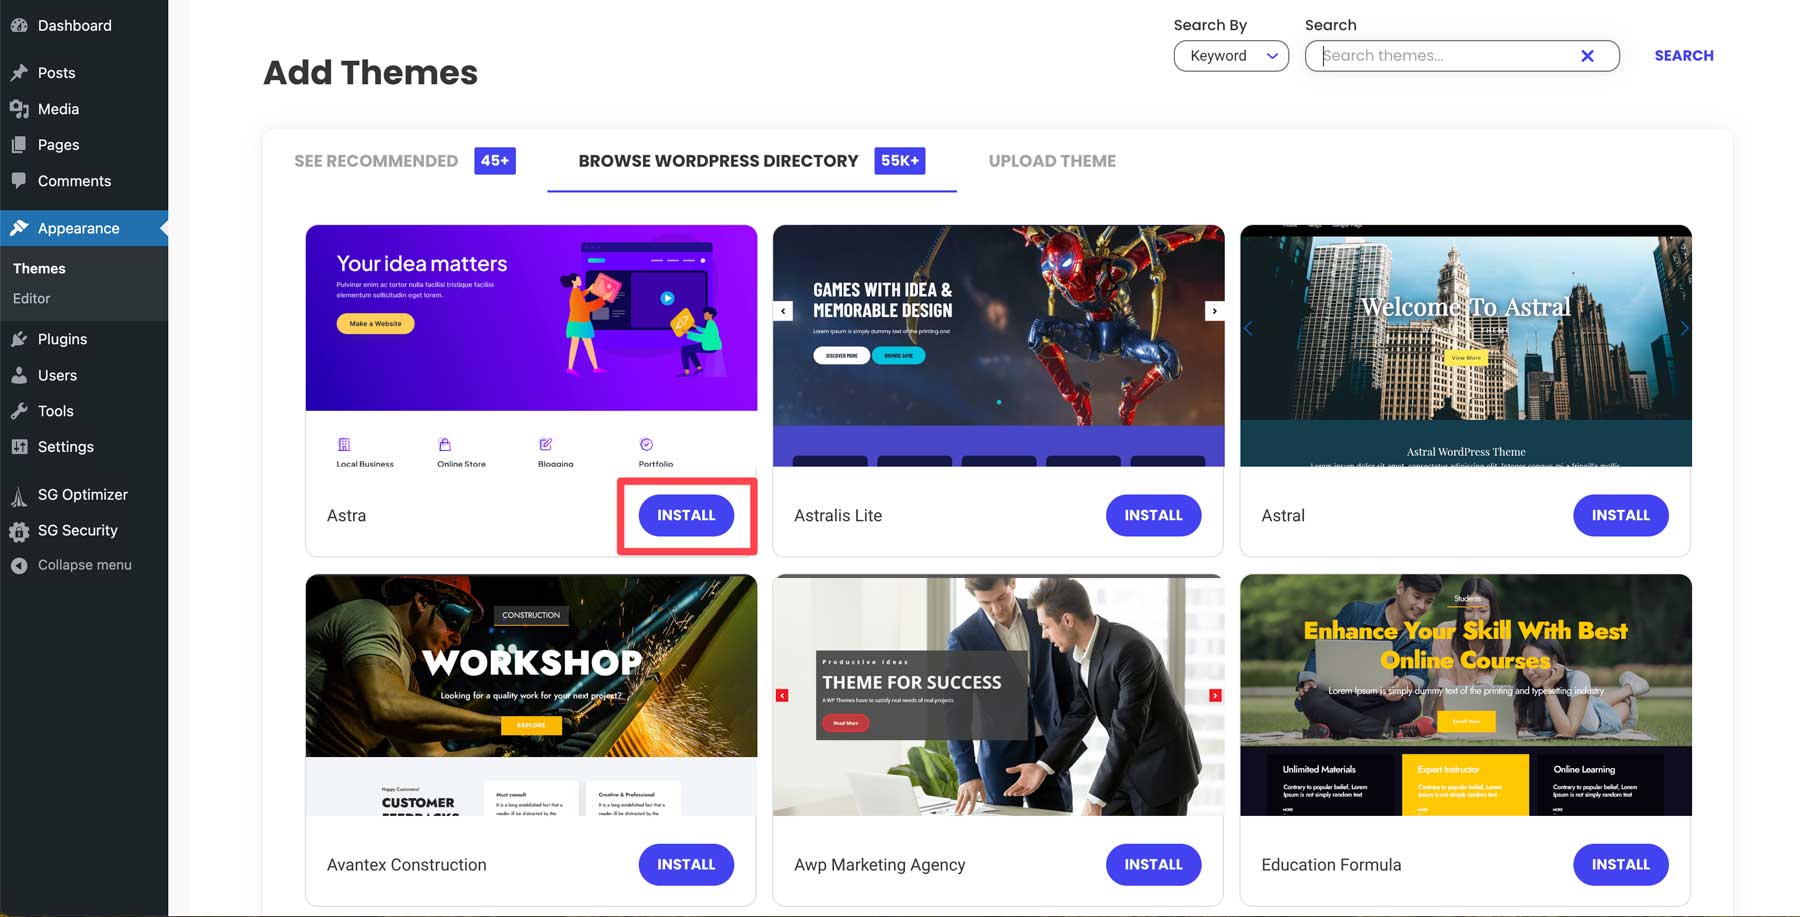
Select your desired theme and click the "Install" button.
Once the theme is installed, click "Activate" to make it live on your website.
Step 4: WordPress for Beginners - Plugins
The next step is to install plugins. The number and type of plugins you need depend on your website's niche and functionality. There are thousands of plugins available in the WordPress repository and third-party vendors, providing various features and capabilities. It's important to have essential plugins to ensure your website's security and functionality. Check out our blog for a list of essential WordPress plugins.
Installing a WordPress Plugin
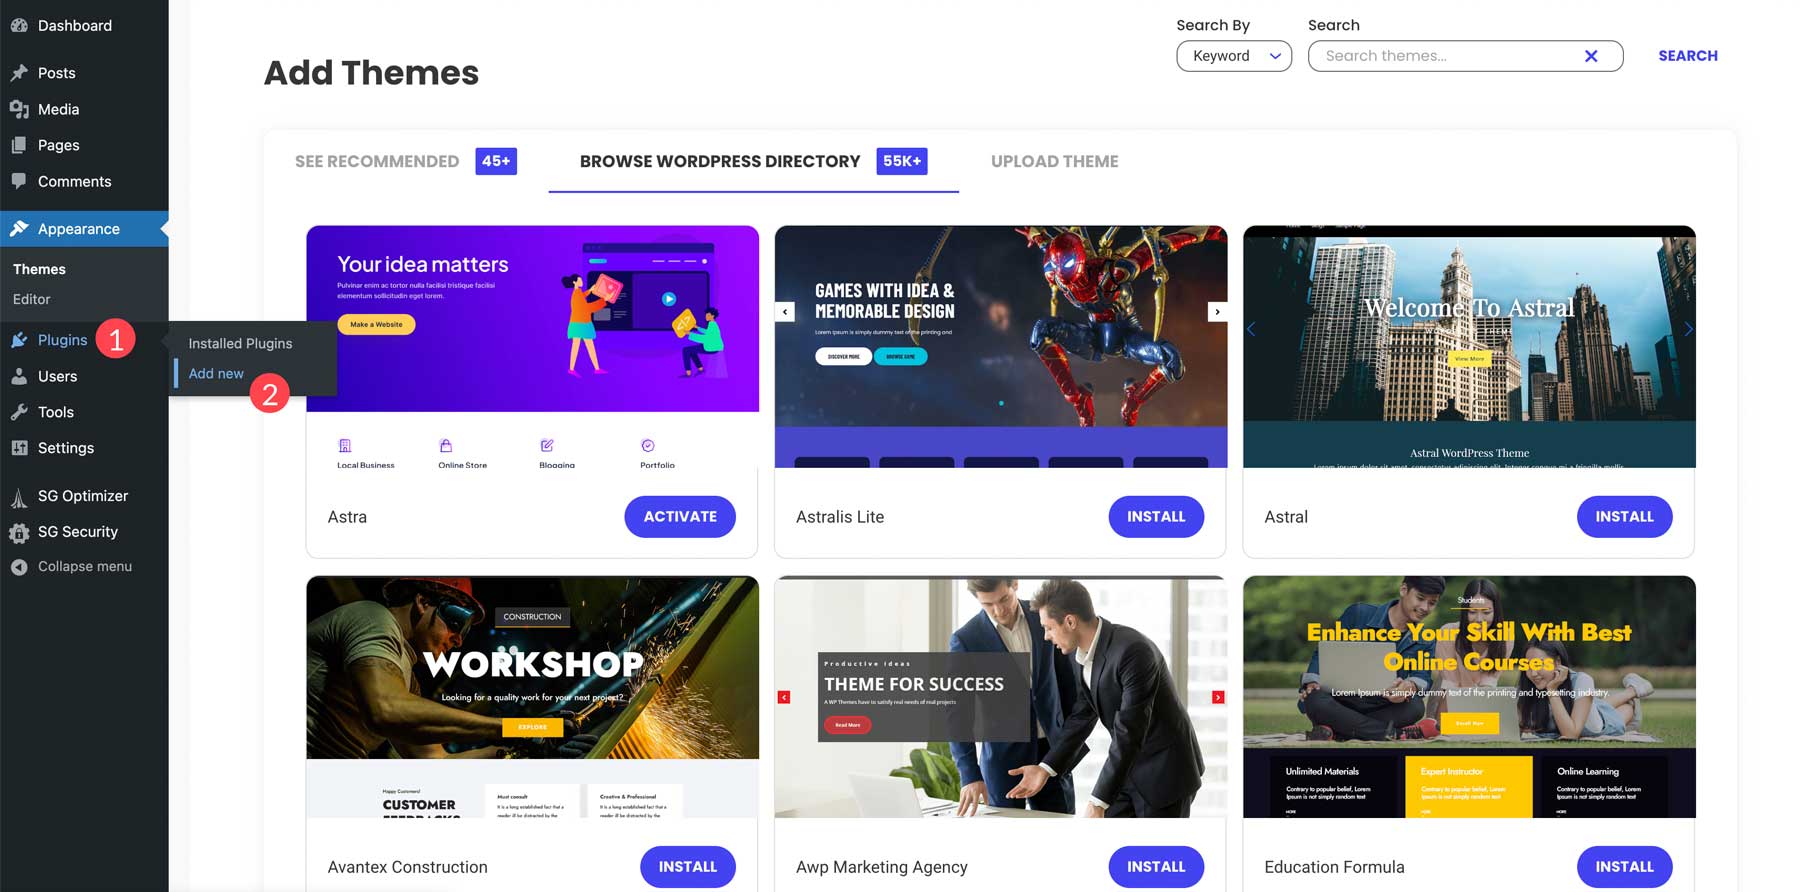
Similar to themes, there are two ways to install a plugin: searching within WordPress or uploading a premium plugin. Go to Plugins > Add New.
The process of installing a plugin from the WP directory is similar to installing a theme. Search or browse for the desired plugin, then click "Install" to download the plugin.

To upload a plugin, click the "Upload plugin" tab, then choose the file.
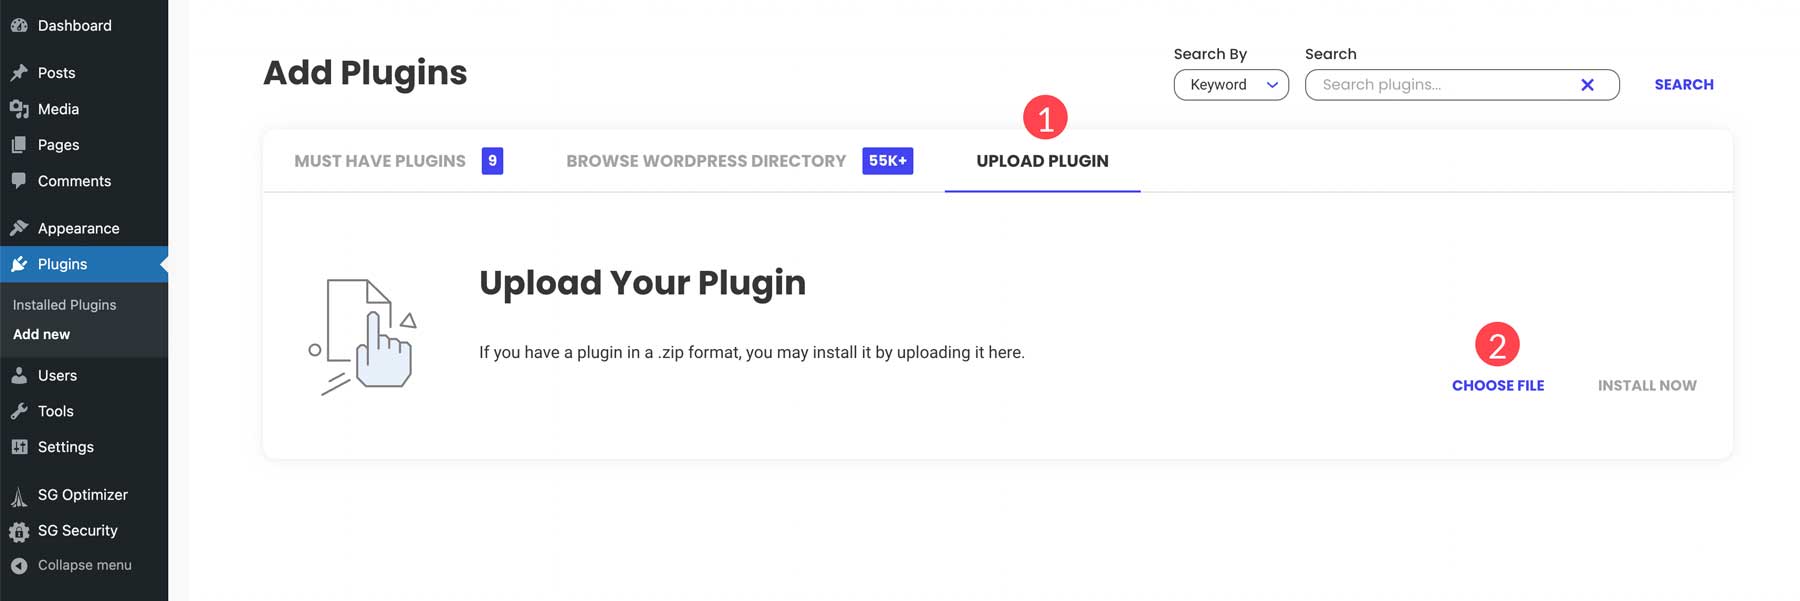
Click "Install Now" to complete the installation.
Step 5: WordPress for Beginners - Adding Content
With the theme and plugins installed, you can now start adding content to your website. Focus on creating posts, pages, and managing media.
Add a Post to WordPress
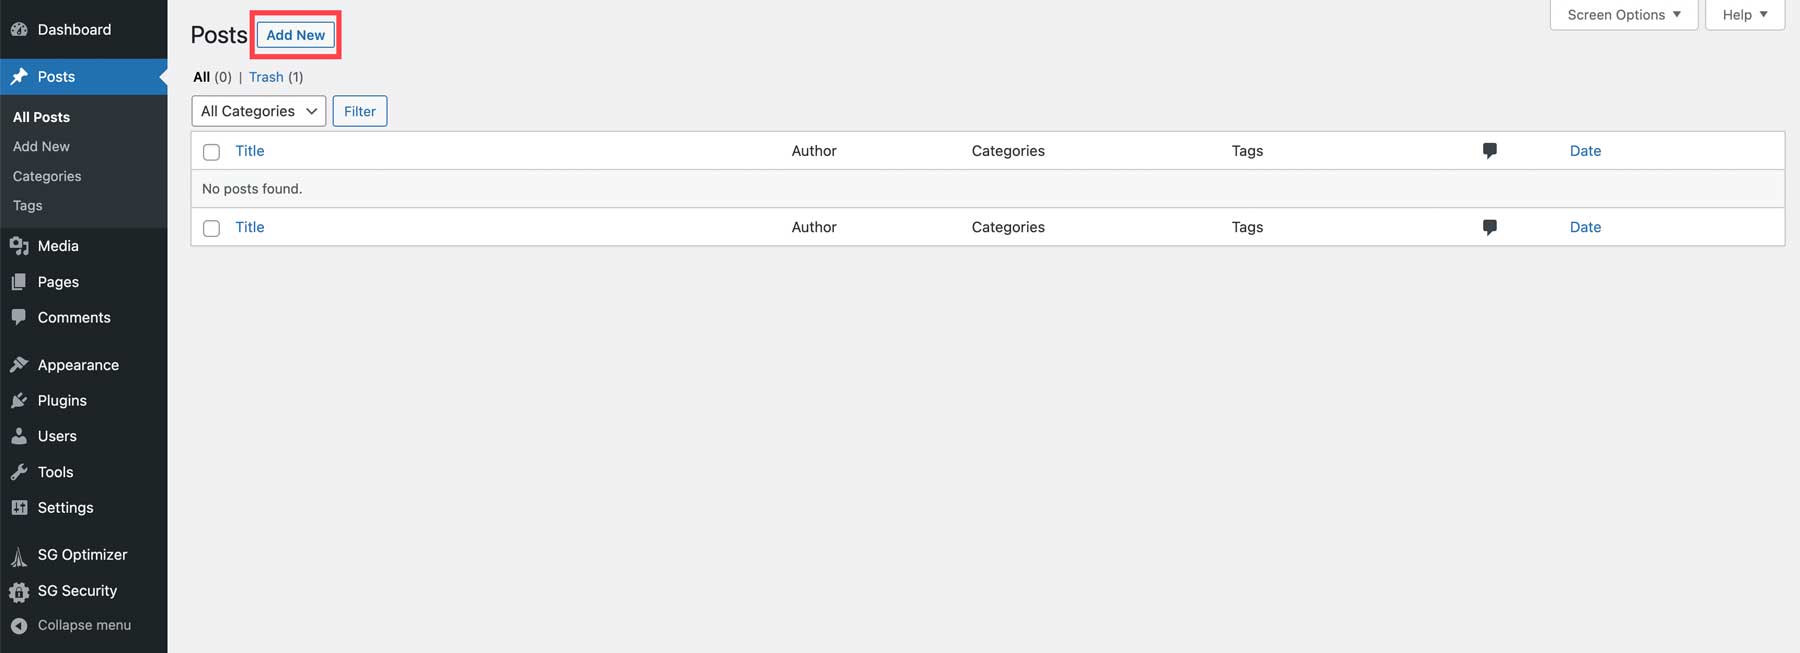
To create a new post in WordPress, click the "Add New" button.
Give your post a title, and then add content.
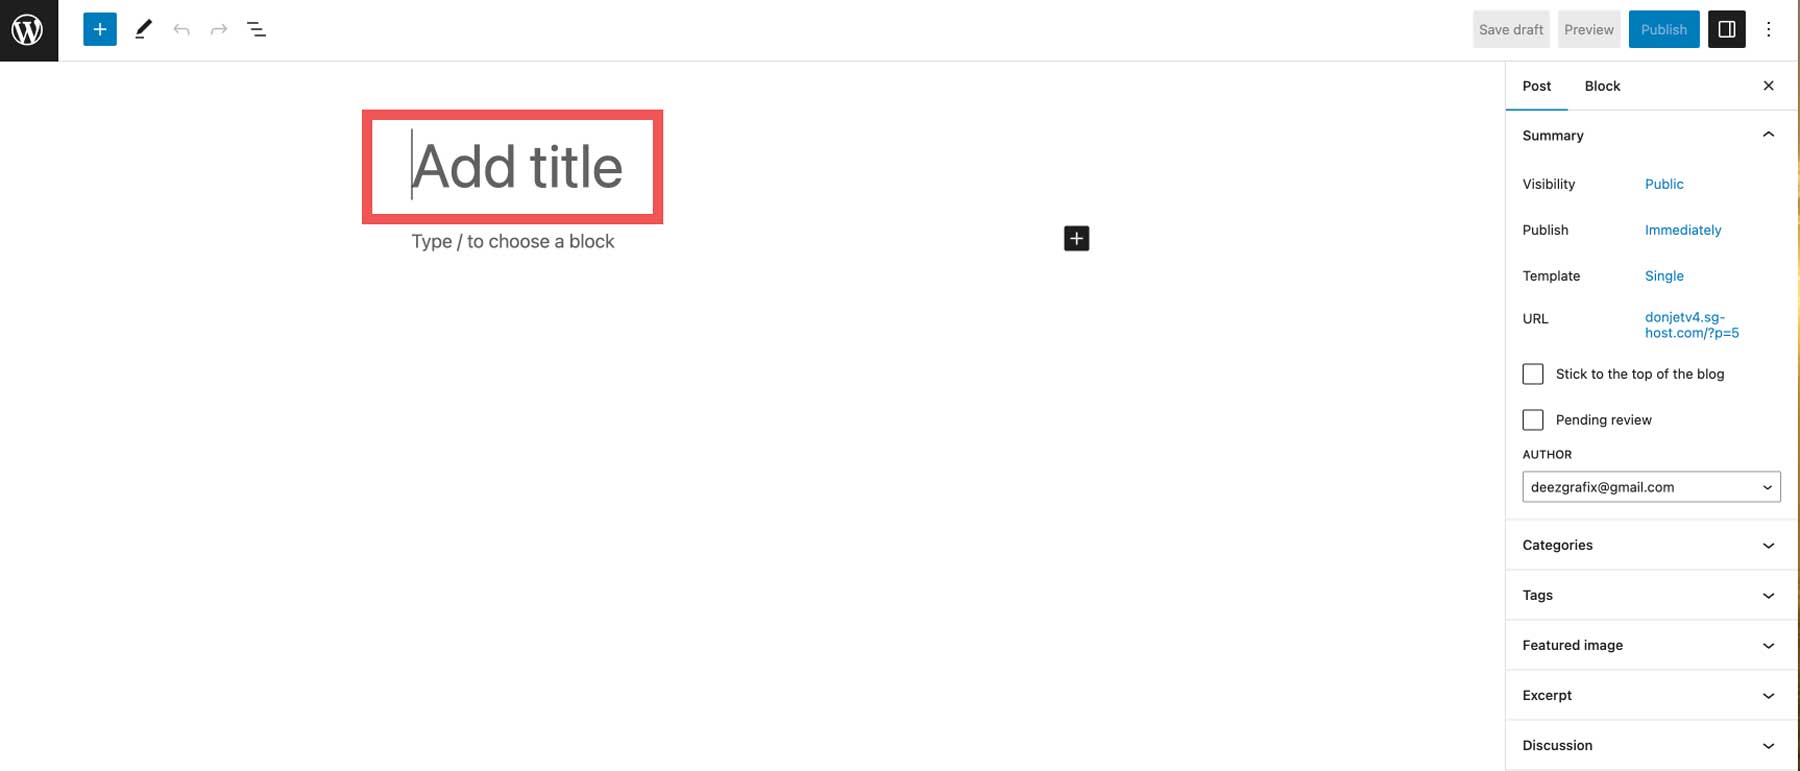
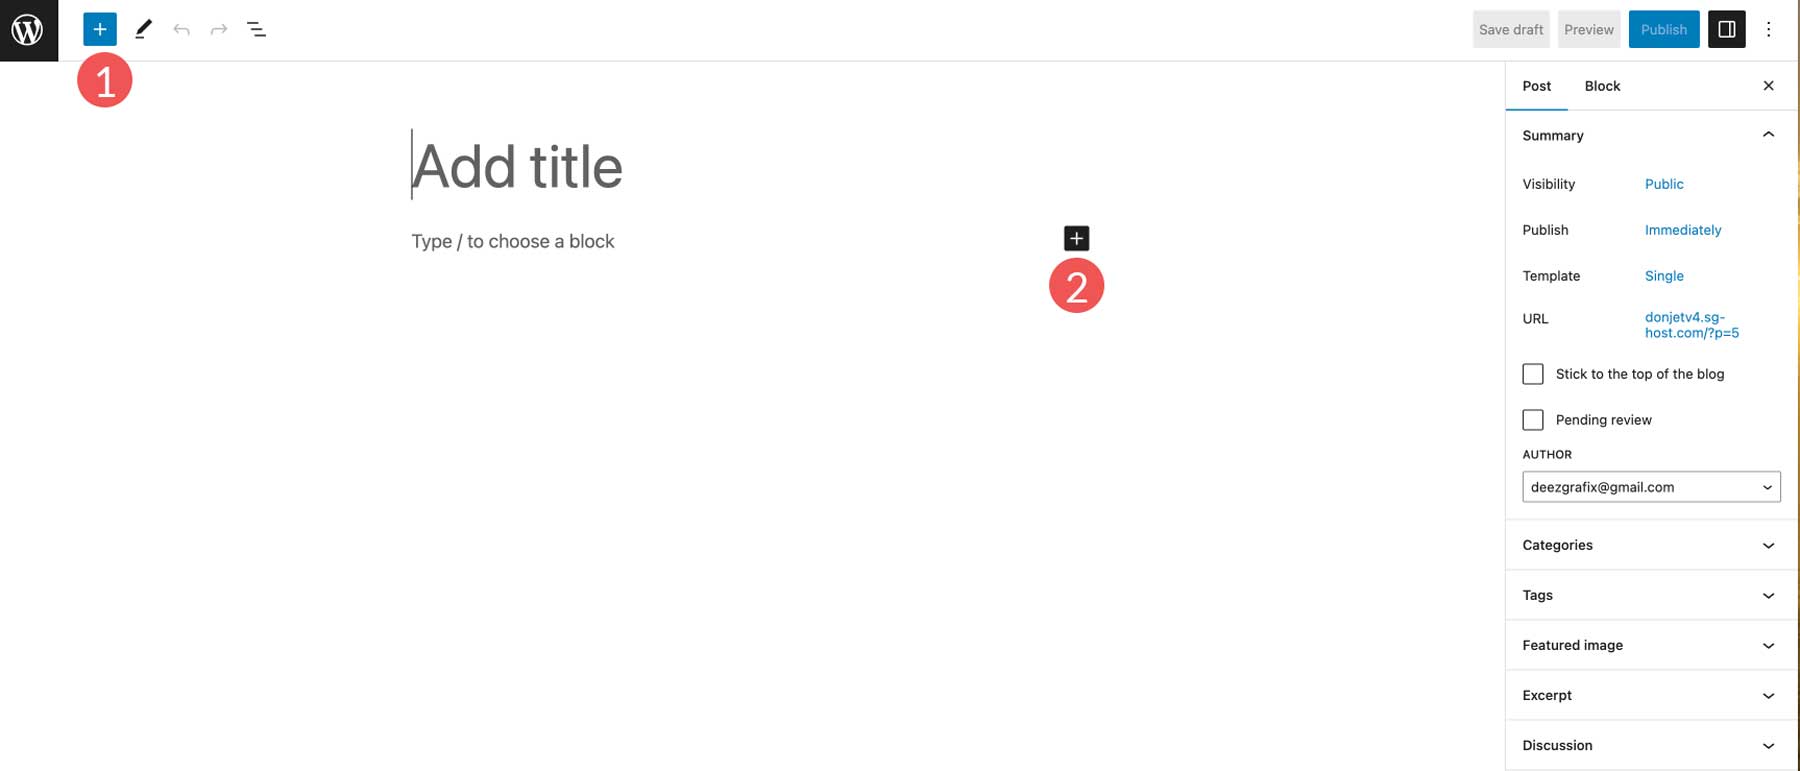
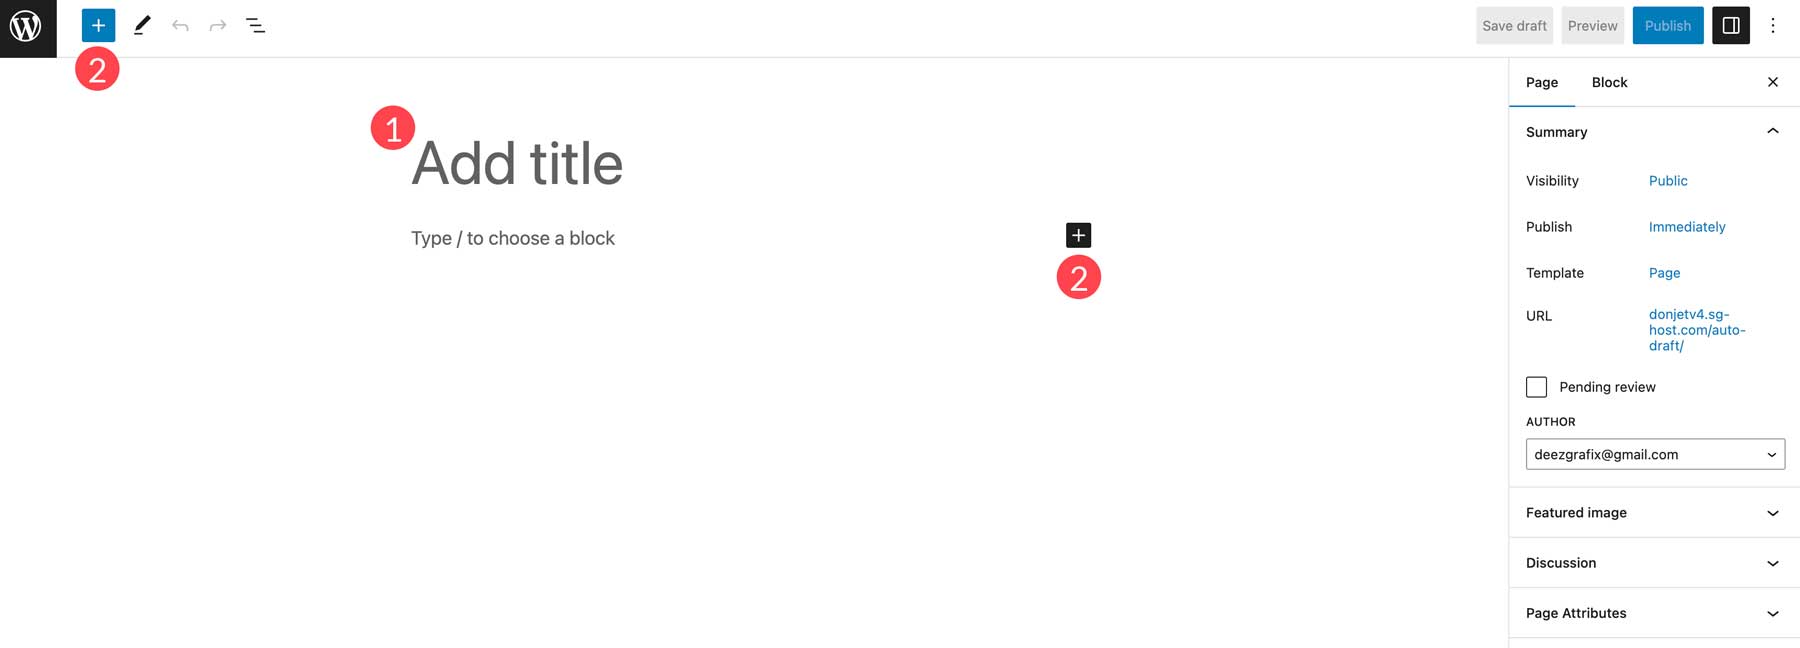
To add content, click the plus icon at the top left of the screen (1) or in the page editor (2).
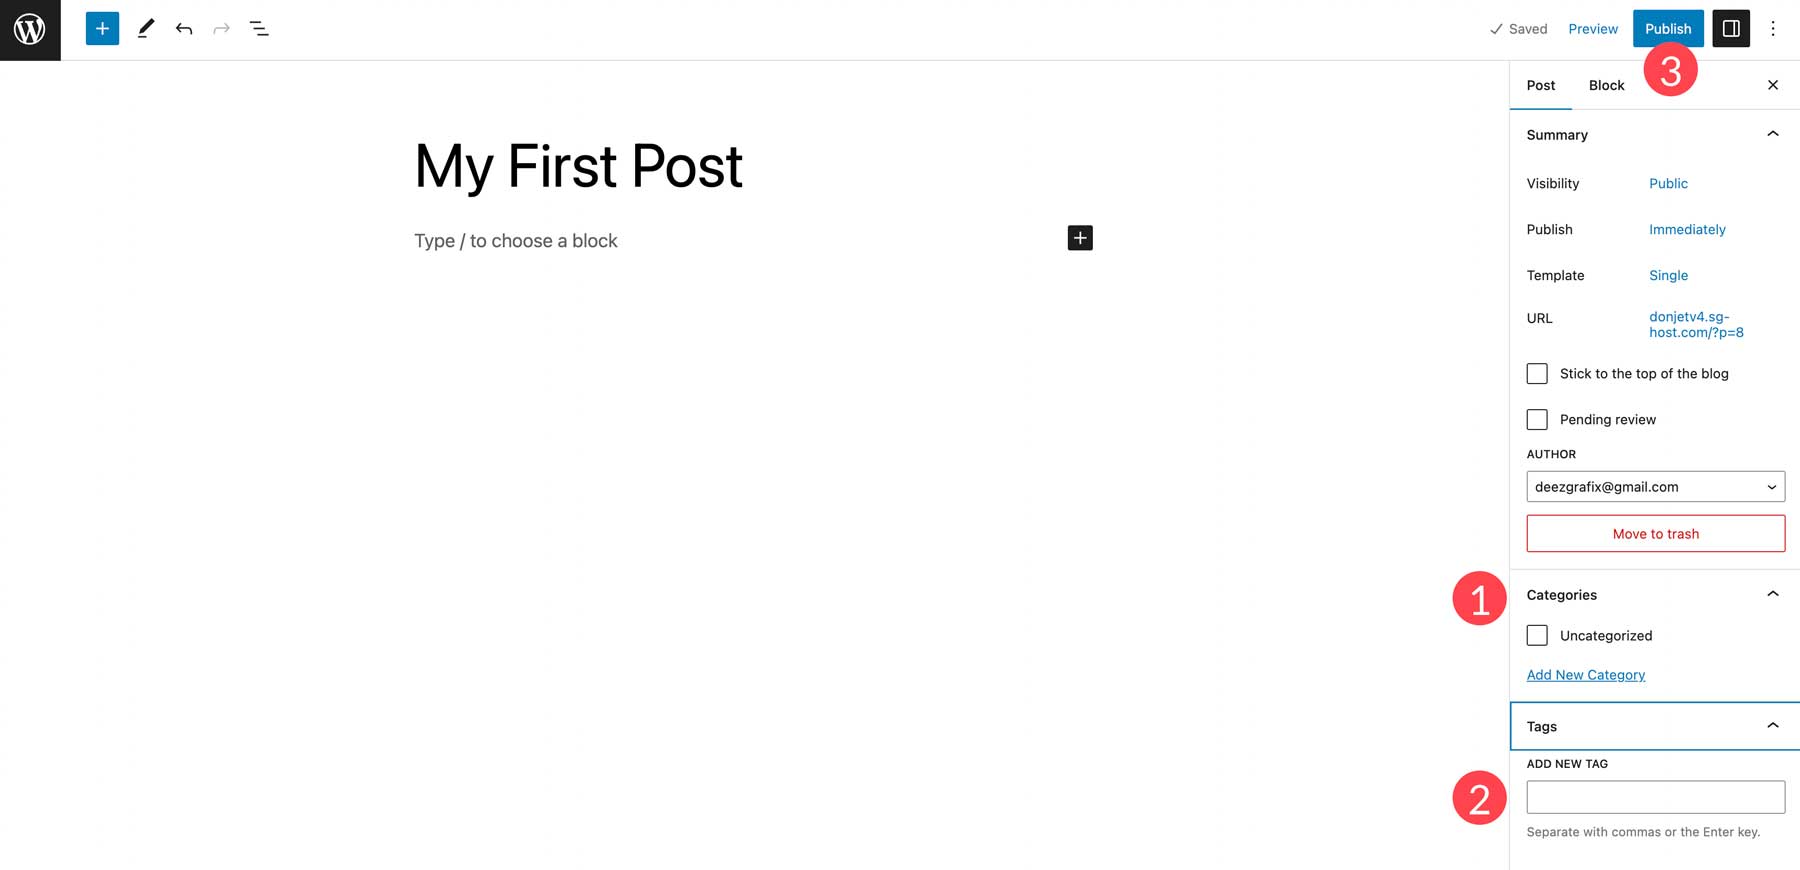
Once you have added content, assign it to a category (1), add tags (2), and click the "Publish" button to make your post live (3).
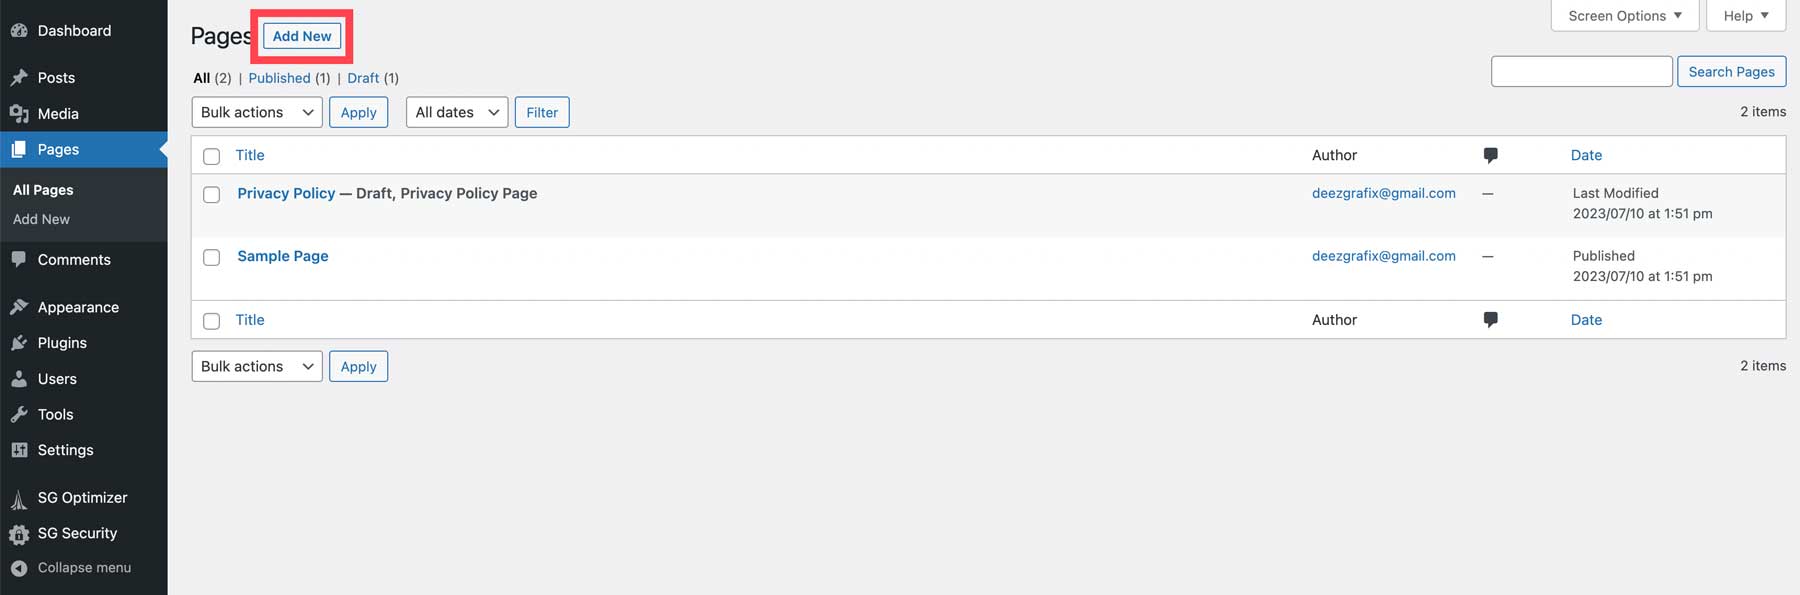
Add a Page to WordPress
To add a new page, go to Pages > Add New.
Similar to posts, provide a title (1) and add content (2).
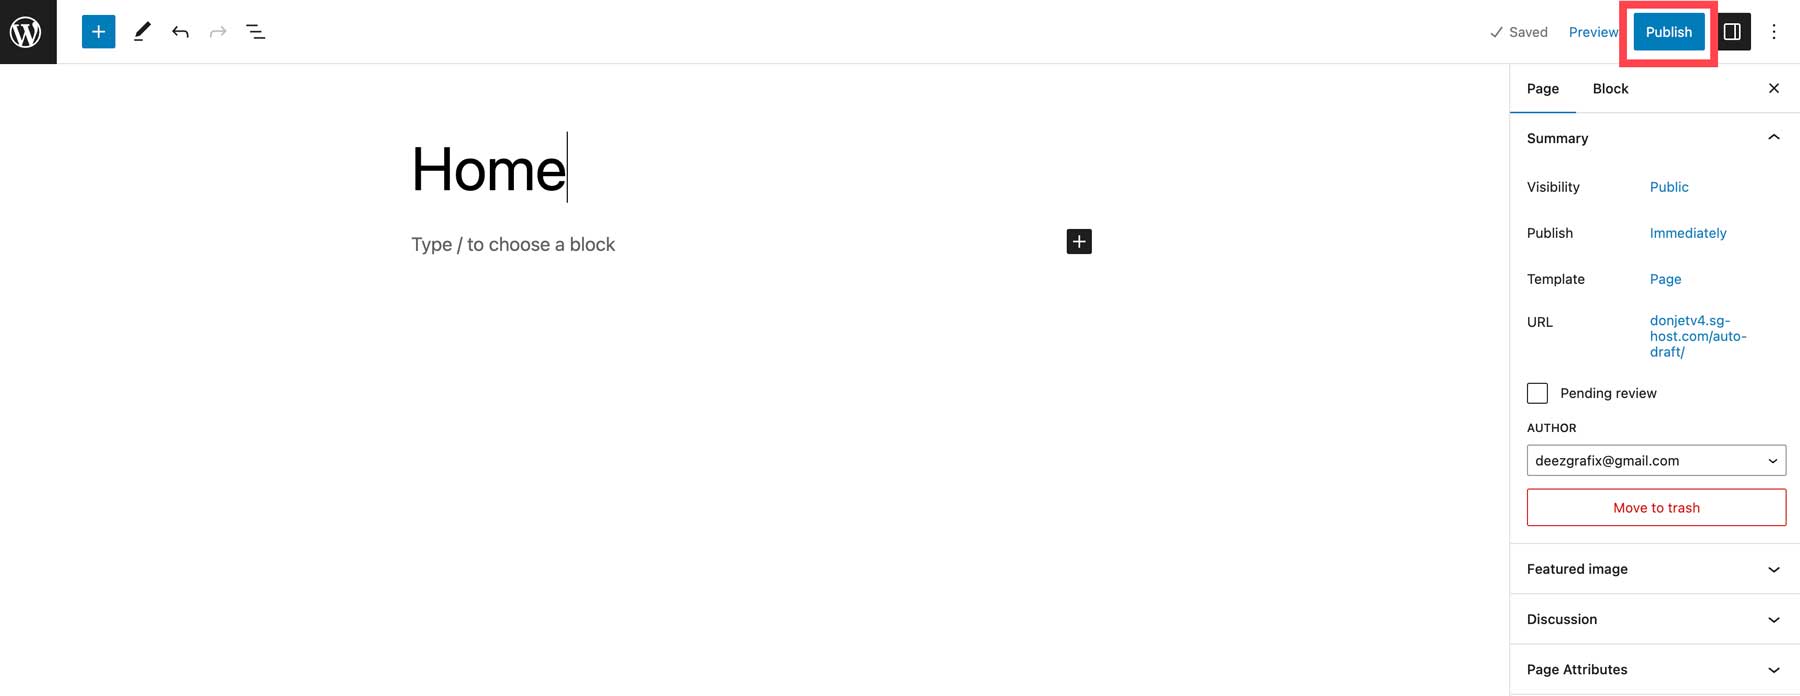
Once all the content is added, click "Publish" to make the page live.
Step 6: WordPress for Beginners - Customization
Before taking your site live, it's important to handle a few final details, such as custom CSS, SEO configuration, social media integration, and setting up your theme's options. These options may vary depending on the theme you selected.
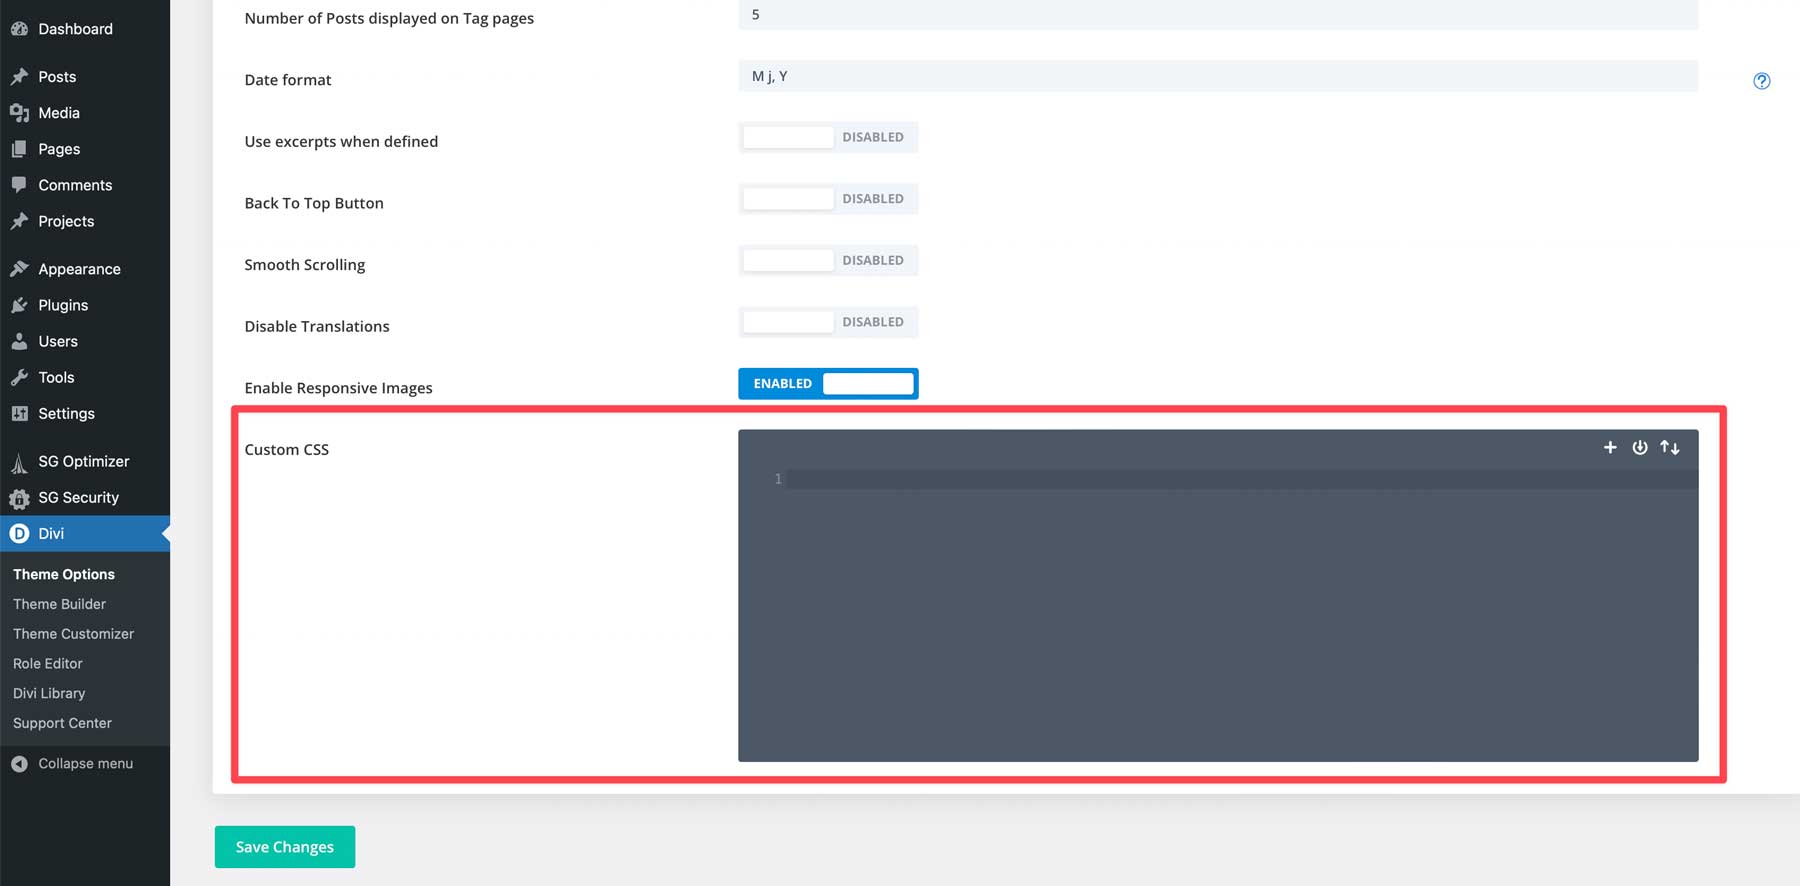
Adding Custom CSS
You can add custom CSS to style specific elements of your website. Depending on the theme, you can add custom CSS through the WordPress customizer or the theme options. More advanced themes like Divi provide additional customization options and settings for CSS.
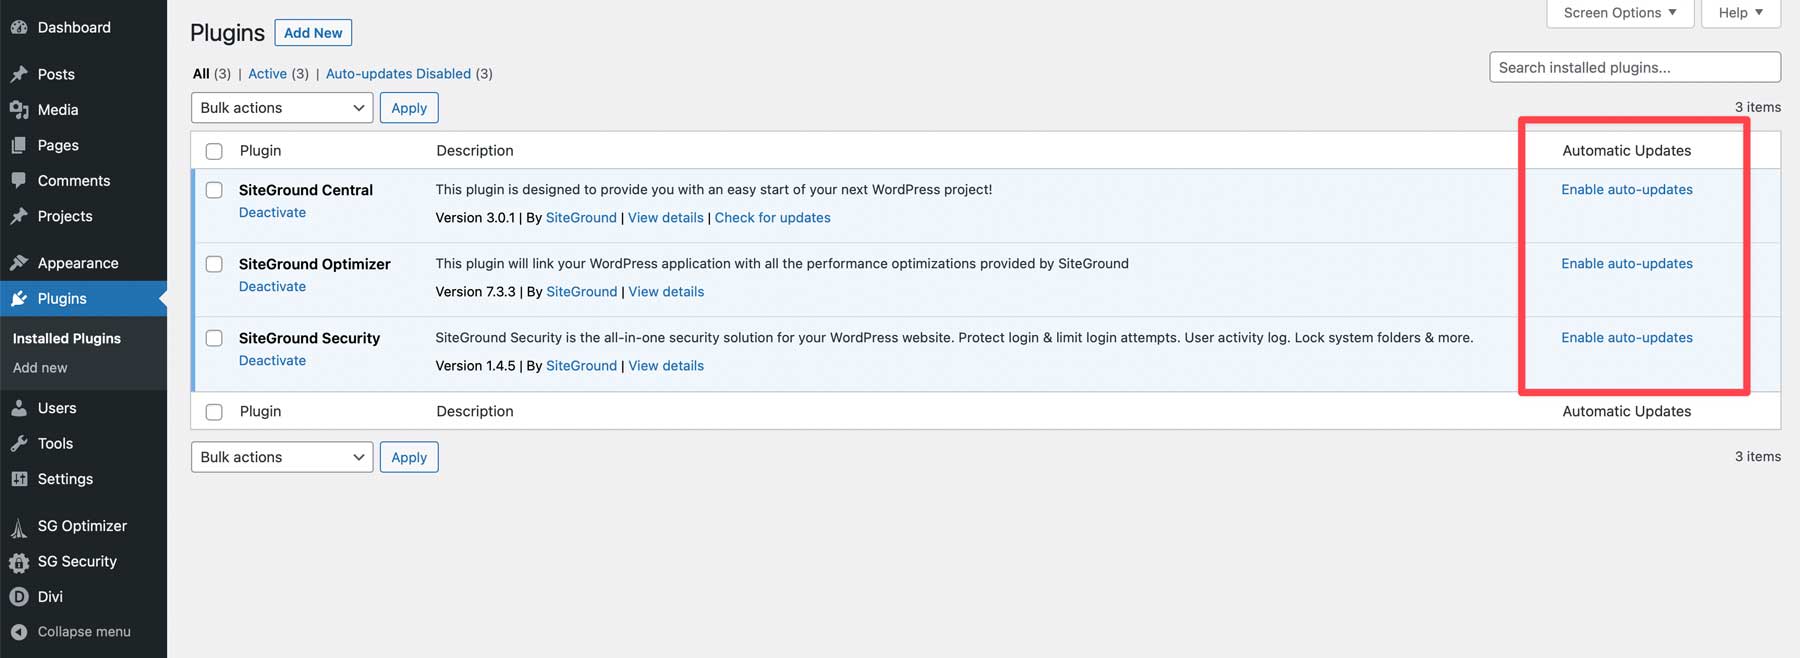
Automatic Plugin Updates
WordPress allows you to enable automatic plugin updates. However, it's important to note that manually updating plugins gives you more control and insight into any potential issues that may arise during the update process. You can use an activity log plugin to monitor updates and troubleshoot any problems.
To enable auto-updates, go to the Plugins section in the WordPress dashboard. Click "Enable Auto Updates" for the plugins you want to update automatically.
Configure Your SEO
Configuring your website's SEO settings is crucial before launching it. SEO plugins like Rank Math offer step-by-step guidance to improve your website's SEO scores by providing helpful tips and suggestions.
![]()
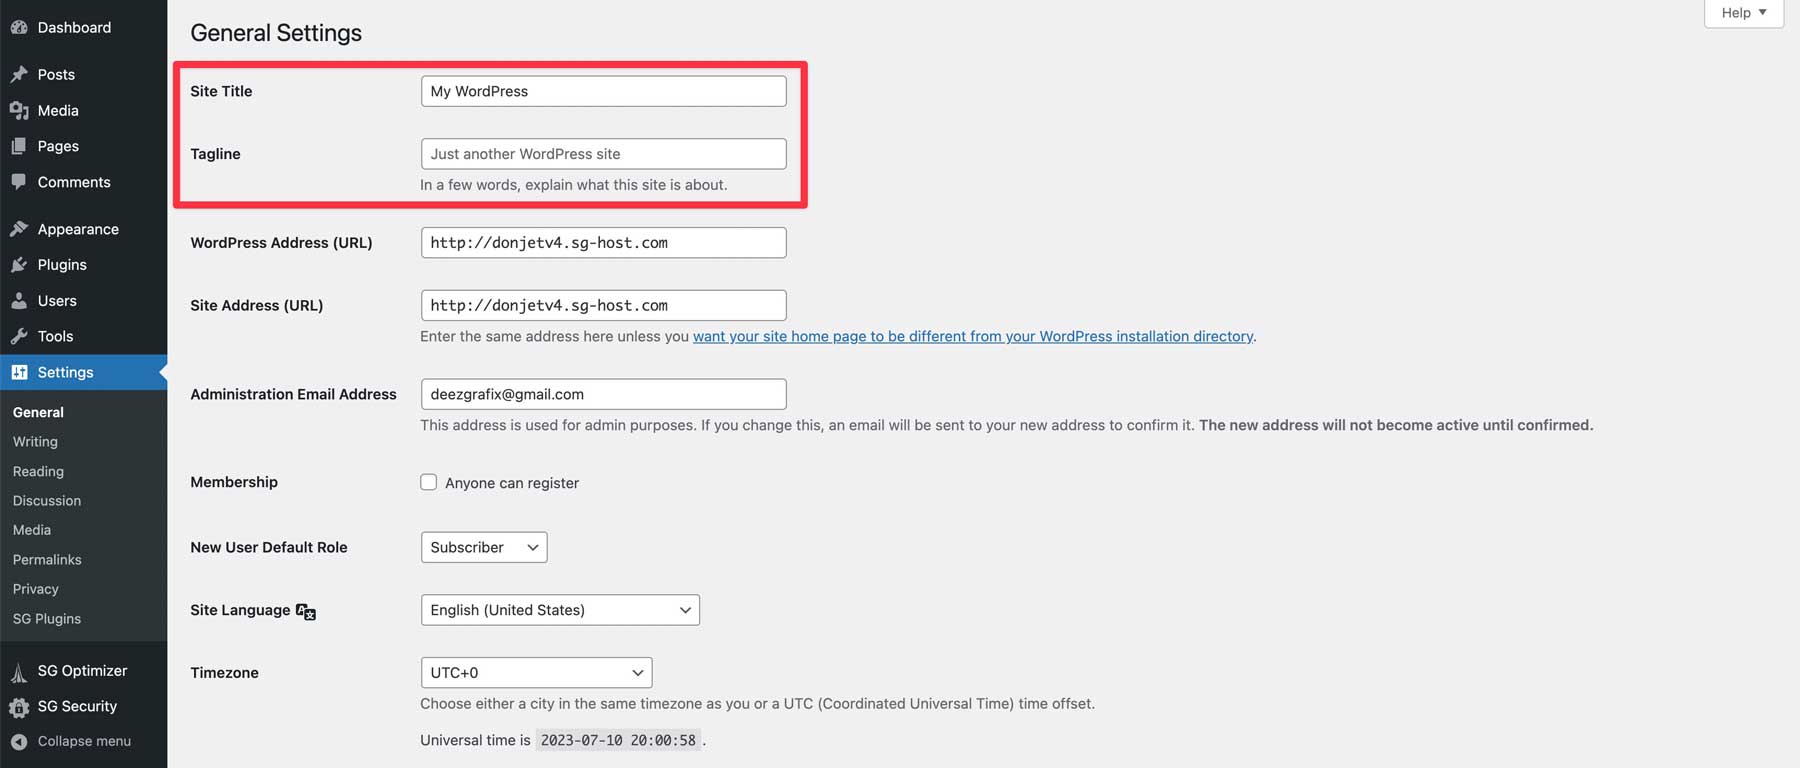
Add a Site Title and Tagline
Your site's title helps visitors identify your website, while the tagline provides a brief description. It's best to use a unique title and tagline to accurately represent your website. To change these, go to Settings > General. Enter your desired title and tagline and save your changes.
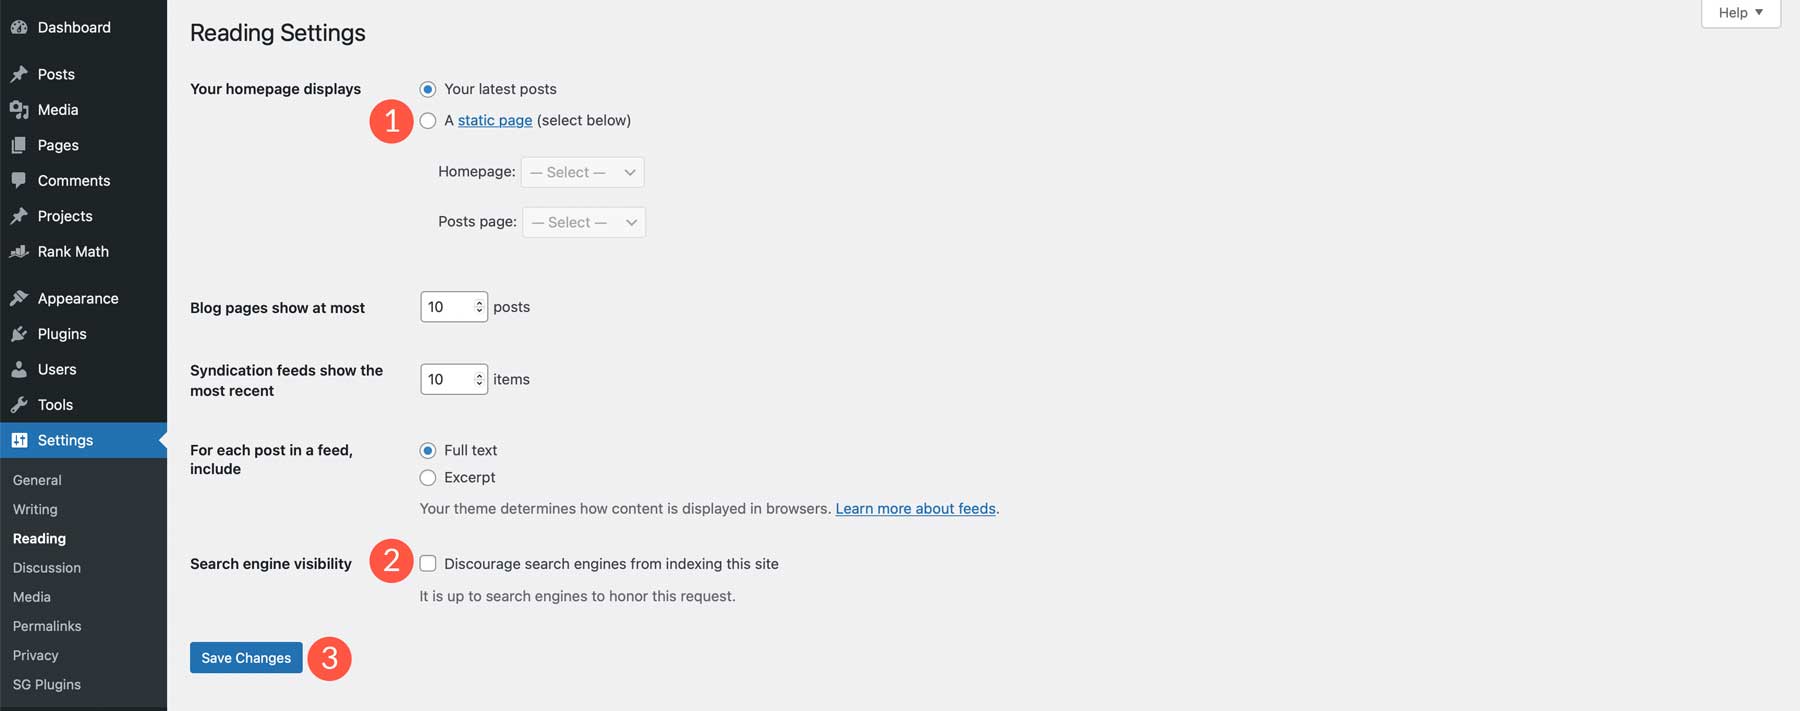
WordPress Reading Settings
There are two important things to configure in the Reading Settings: setting a home page and unchecking the "Discourage search engines from indexing this site" option. You can choose to display your latest posts on the home page or select a static page. It's important to leave the "Discourage" option unchecked to allow search engines to index your site. Save your changes when you're done.
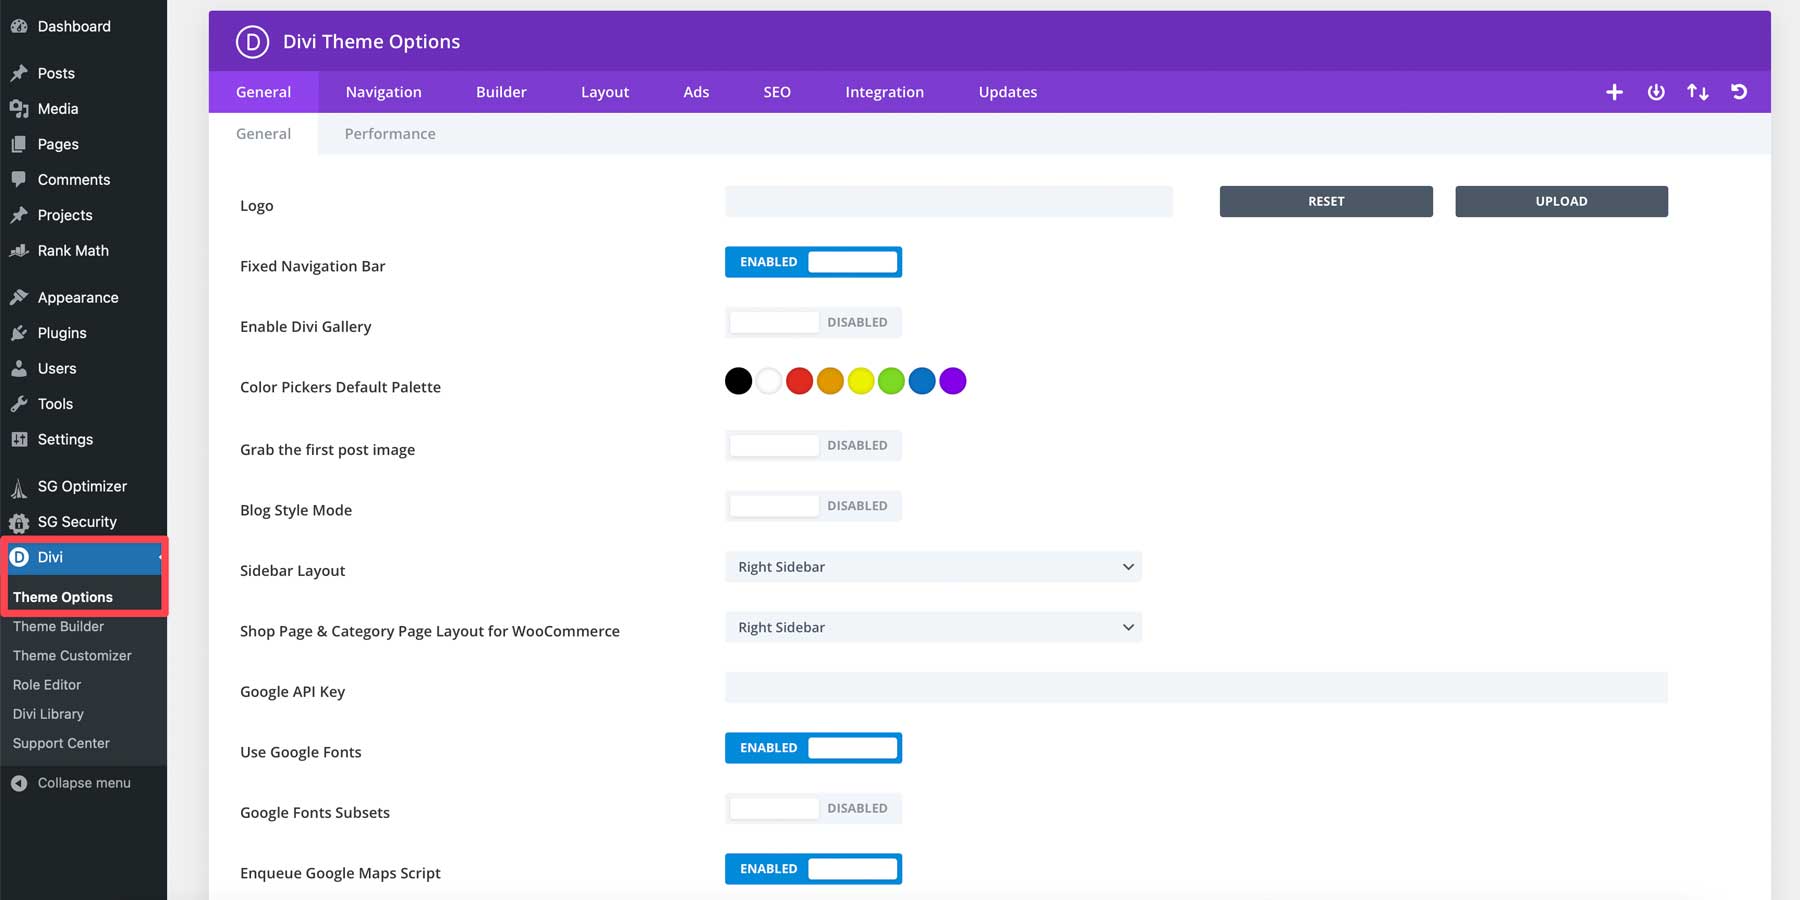
Configure Theme Settings
To properly represent your business, it's essential to customize your theme's settings. Add your logo, social media accounts, and configure color and font settings. The available options depend on the theme you're using. For example, with Divi, you can access theme options in Divi > Theme Options. Consult the relevant documentation for your theme to learn more about customization options.
Backup Your Site
Before launching your site, it's crucial to create a backup. Backing up your website ensures that you have a recent copy of your website's files in case any issues arise during the launch process. Many managed hosting providers like SiteGround and Cloudways offer backup services as part of their hosting plans. However, depending on your host, you may need to install a backup plugin.
Step 7: WordPress for Beginners - Taking Your Website Live
The final step is to take your website live. If you built your site using a temporary domain, you will need to add your desired domain name. Different hosting providers may have additional steps for launching, so consult their documentation or support.
After your site is live, make sure to:
- Conduct a speed test to ensure your website performs optimally.
- Test all forms on your website and make sure they function correctly. Install an SMTP plugin if necessary.
- Create a post-launch backup to ensure you have the latest version of your website.
- Secure your website with an SSL certificate. Follow the appropriate steps provided by your hosting provider.
- Submit your XML sitemap to Google for better search engine indexing.
- Double-check all SEO metadata to optimize your website for search engines.
- Set up and integrate analytics using an analytics plugin to track your website's performance.
Final Thoughts on WordPress for Beginners
WordPress is a versatile and powerful CMS that can be used to create a wide range of websites. While there may be a learning curve at the beginning, it is user-friendly and easy to master. With a vast community, tutorials, and plugins available, you can customize your WordPress website to suit your needs. To make the most out of WordPress, choose a quality hosting provider like SiteGround for easy installation and management of your WordPress site.
If you need more tutorials, check out our comprehensive guide on how to make a website from scratch.
Featured Image via olesia_g / Shutterstock.com
Source